Cauliflower Fried “Rice” with Grilled Asian Tofu

Cauliflower Fried Rice with Asian Grilled Tofu

There are so many food ideas I want to try that inevitably it takes me longer to get to certain things than others. Case in point: Cauliflower “rice” arrived on the scene, at least on my radar, several months ago. It got added to the queue and was only finally made by me a week or so ago. I’ve said this before but if only there were more meals in the day (and time to make them…) so I could get to making all the creative recipes out there , as well as my own recipe ideas, faster!
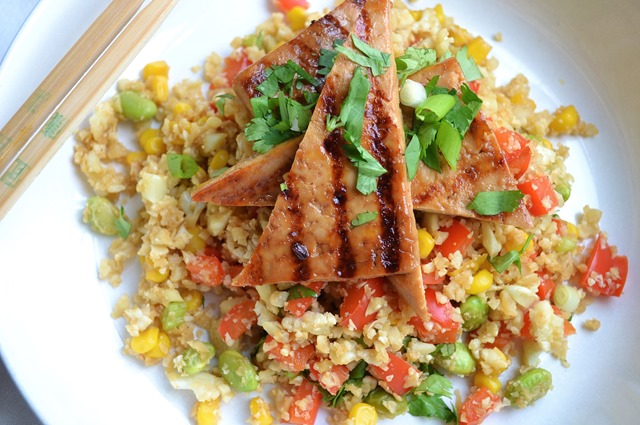
Cauliflower Rice with Grilled Asian Tofu | coconutandberries.com

Before anyone thinks I’m going on some carb-eliminating diet or something, I better just stop and say that I’m in no way cutting grains from my diet. Rice features in a good many of my meals and I have no problem with it at all- Make mine brown basmati though please Smile.  Sometimes, however, I’m simply in the mood for a more vegetable-centric meal.
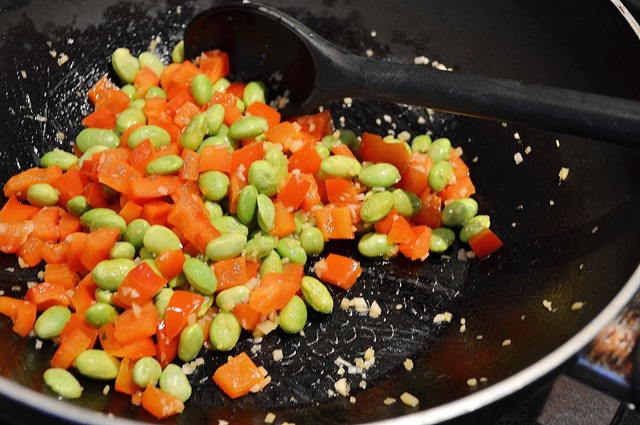
Stir-fried veggies

To the cauiflower “rice” base I added plenty of other vegetables, including edamame, a favourite of mine, and also a great source of protein, so even without the grilled tofu on top you’ve got a fairly substantial dish. Simply seasoned with lots of ginger and garlic and a couple of splashes of tamari it’s a snap to put together too.
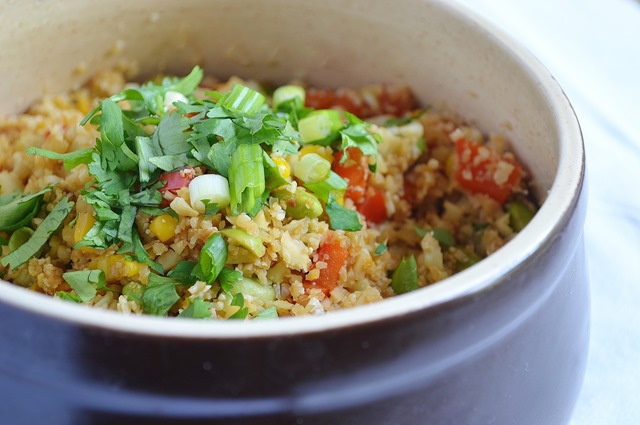
Cauliflower Fried Rice


Cauliflower Fried “Rice” with Grilled Asian Tofu

Yield: 2-3 Servings

Ingredients

    For the Tofu (Optional):
  • (From Veganomicon)
  • 1/2 400g/8oz Block Tofu, Drained, Pressed and cut into thin slices (I got 4 rectangles)
  • 1/4 C Mirin
  • 1-1/2Tbsp Tamari
  • 1 Tbsp Brown rice vinegar
  • 1/2 Tbsp Sesame oil
  • 1/2 tsp Sriracha chili sauce
  • 1/2” Pc fresh ginger, chopped into large chunks (for flavouring the marinade)
  • 1 Clove garlic, smashed (for flavouring the marinade)
  • For the Cauliflower Rice
  • 1 Small head cauliflower
  • 1 Tbsp Coconut oil
  • 2 Lg cloves garlic
  • 1 Tbsp Minced fresh ginger
  • 1 Red pepper, diced
  • 3/4 C Frozen edamame
  • 1/2 C Corn
  • 2 Tbsp Tamari
  • 3 Spring/Green Onions, thinly sliced
  • Fresh coriander, for garnish

Instructions

  1. Mix all listed ingredients for the tofu, except tofu itself, in a large, shallow dish. Lay slices of tofu in the marinade and leave for 30 minutes, flipping tofu halfway through.
  2. While marinating prepare the vegetables. Using a food processor, pulse cauliflower florets until you get a rice-like texture, or alternatively chop finely. I got 4 cups of rice. Set aside.
  3. On a hot grill pan, lightly brushed with oil, grill tofu for 3 minutes on 1 side, then flip and cook for a further 2 minutes. Using tongs gently press tofu into the grill ridges, to get nice dark lines. Move to a chopping board and cut each piece diagonally into 2 triangles.
  4. While tofu is cooking,  heat oil in a wok or large pan until very hot,  toss in ginger and garlic and cook, stirring, for a couple of minutes.
  5. Add red pepper and edamame and continue to cook for a further 2 minutes until pepper is beginning to soften, then add corn and cauliflower and mix together well.
  6. After another 2 minutes, drizzle the tamari over and stir through the spring onion (reserving a small amount for garnish). Continue to cook for another minute until everything is heated through. Sprinkle over reserved spring onions and fresh coriander.
  7. Spoon onto individual plates or bowls and top with a few triangles of the grilled tofu.
http://www.coconutandberries.com/2013/07/13/cauliflower-fried-rice-with-grilled-asian-tofu/

Cauliflower Rice with Grilled Asian Tofu

There have been lots of internet food trends which haven’t been hits in my kitchen but I’ll definitely do the cauliflower rice thing again.

Are there any food trends which have stuck with you?

If you’re new to Coconut and Berries, please sign up for email updates and join me elsewhere!  I’m on Facebook,  Pinterest,Instagram (@coconutandberries), Google + and Twitter! You can also follow Coconut and Berries with Bloglovin or Feedly.
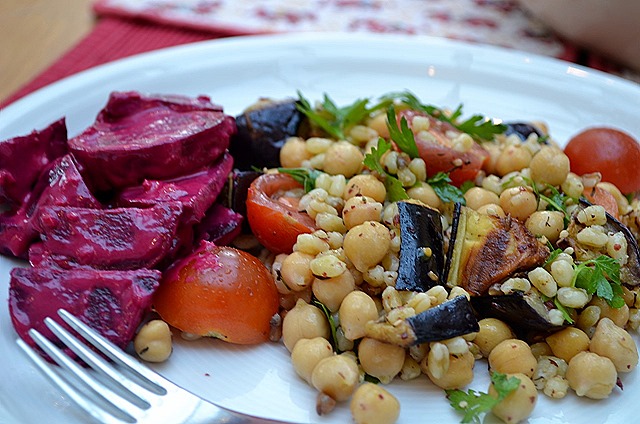
Wheat Berry Salad with Chickpeas + Za’atar, Tahini Beetroot

Wheatberry Salad with Chickpeas + Za'atar

I’ve already talked about my love for Middle-Eastern flavours on the blog and I’m featuring them again today in another couple of recipes.

Dried pulses, fresh produce, herbs and spices, olive oil, lemon, garlic and grains are all characteristic ingredients in dishes from that part of the world. You can probably see why I’m drawn to them, given how naturally vegan-friendly they are, not to mention packed with flavour.

Za’atar is a herb and spice blend widely-used in the Middle-East.  Its specifics vary according to region but it usually includes toasted sesame seeds, dried thyme and sumac. It’s used as a seasoning for grilled vegetables, salads, sprinkled on top of hummus and mixed with olive oil and spread on flatbread, known as manakeesh.

I brought a bag of freshly ground sumac home  from the Grand Bazaar in Istanbul last year and am always on the lookout for new ways to use this tangy, lemony spice. So far I’ve especially enjoyed it rubbed onto roasted potatoes, a light sprinkle on fattoush (cucumber, tomato, herb + pita salad), and now in this spice blend.

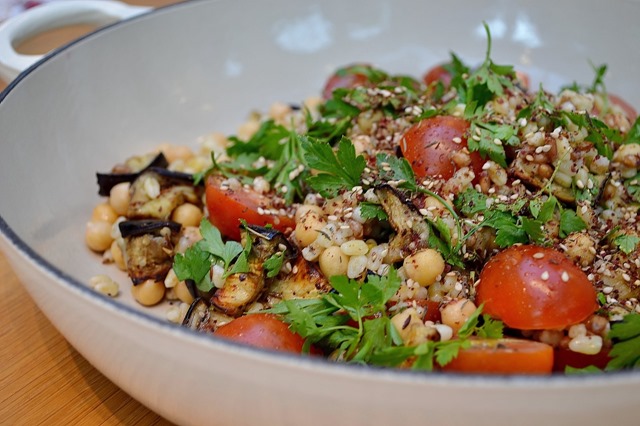
Wheat Berry Salad with Chickpeas + Za’atar

I love all the different textures in this salad, with the chewy wheat berries, tender chickpeas, melt-in-the-mouth roast aubergine and juicy fresh tomatoes. The combination made it satisfying enough for a supper salad, alongside my delicious tahini beetroot.Grain and bean salads hold up well for a while in the fridge too so this salad would be perfect to keep on hand for quick lunches throughout the week.

Wheat Berry Salad with Chickpeas + Za’atar

Adapted from Green Kitchen Stories

1 1/2C Cooked chickpeas/ 1 Can chickpeas
1/2C Wheatberries OR Farro OR Spelt berries
1 Large aubergine, diced into 1” chunks
1 T Olive oil, 1/2 t cumin seeds, 1/2 t sumac
1 C Cherry tomatoes, halved
2T Lemon juice
1T Olive oil
Salt + Pepper
Large handful of fresh flat-leaf parsley, roughly chopped
1-2T Za’atar spice blend

Za’atar *

1T Toasted sesame seeds (toast in dry pan over medium heat, tossing occasionally, approx 5 minutes or until fragrant)
1T Sumac
1/2 T Dried thyme
1/4 T Ground cumin

* I just made a small amount, enough for this recipe and to rub on a few flatbreads but I recommend doubling the recipe as it’s nice to have prepared for other dishes.

Cook your wheat berries according to the package instructions. I used semi-pearled so they only took 30 minutes but they can take up to an hour. Drizzle with a little olive oil and a sprinkle of salt and pepper and leave to cool while you prepare the rest of the ingredients.

Toss the aubergine chunks with 1T oil, sumac and cumin seeds, spread in an even layer on a baking tray and roast at 200C/400F for 20-30 minutes until brown and very soft.

In a bowl combine wheat berries, chickpeas, warm roasted aubergine and halved cherry tomatoes. Mix in remaining olive oil, lemon juice and plenty of salt and pepper. Sprinkle liberally with chopped parsley and za’atar seasoning to taste. Toss again and serve.

Serves 3-4

Wheat Berry Salad with Chickpeas + Za’atar, Tahini Beetroot

The tahini beetroot I made to go with the salad is a repeat recipe in my kitchen. Everyone who tries it loves the stuff and it’s a great accompaniment to all sorts of dishes, not just those with Middle Eastern flavours.

I cut the beetroot in a different way each time I make it but I think I’ve finally decided that julienned (as in the below picture) is the way to go-  greater surface area allowing for maximum sauce coverage.

I originally found the recipe at The Kitchn but now know it off the top of my head.

Tahini Beetroot:

3-4 Small to medium beetroot, roasted and peeled (Scrub beetroot, slice off greens, wrap loosely in foil, place on a baking sheet and roast at 350C for approx 1 hour, or until the beetroot fall off a knife easily when pierced. Leave to cool and skin should rub off easily)
2 Garlic cloves, minced
1/4 t Sea salt
2T Tahini
1 1/2T Lemon juice
2-4 T Water

Slice cooled beetroot into thick matchsticks (or your preferred shape)

Use pestle and mortar to grind garlic and salt into a smooth paste. Add tahini and lemon and stir until homogeneous. It will separate initially but keep stirring and it will smooth out. Thin with water to desired thickness.

Combine sauce with beetroot in a bowl, cover and refrigerate until ready to serve. It’s best left an hour or 2 to sit so the sauce soaks in.

Serve with the above salad or with a selection of mezze.

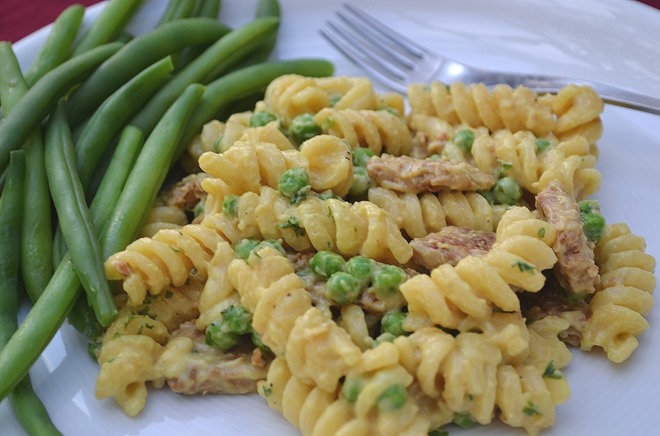
Tempeh Pasta alla Carbonara

Tempeh Pasta alla Carbonara

Pasta alla carbonara, the classic Italian dish, typically combines spaghetti with fried pancetta or bacon and a sauce made with eggs, cheese and cream. Decidedly non-vegan fare, but here of course done vegan-style!

Nuts show their magic once again in this velvety, animal-product free sauce (with tahini and cashew butter), and salty, crispy tempeh stands in brilliantly for the pancetta.

Ricki Heller is to thank for this recipe. Ricki writes the blog Diet, Dessert and Dogs, home to a phenomenal number of fantastic vegan kitchen creations-“sugar-free, gluten-free, allergy-friendly”.

I’ve made a lot of her recipes:  Grain-free coconut flour biscuits, Edamame seaweed saladLemony baked cheesecake, Warm chickpea + artichoke salad, Chocolate almond mousse, Fruity cabbage salad, Almond + curry sauce, Quinoa chickpea olive + prune tagine, Carob + date pancakes….just to name a few, and I can’t name any failures!

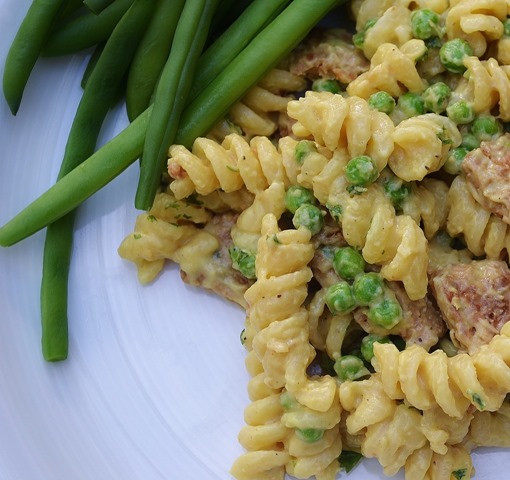
Tempeh Pasta Carbonara, close-up

My Granny was eating with us the evening I made this pasta and knowing that she doesn’t usually eat a lot I just gave her a small amount, but she was nabbing bits of the tempeh bacon from the serving dish and said how much she enjoyed it. I’ll make a vegan out of her yet…!

Tempeh Pasta Carbonara

There are a few components to the recipe but it really doesn’t take that long to come together so don’t be put off by the ingredients list and instructions.

Tempeh Pasta Carbonara

(Minimally adapted from Diet, Dessert, and Dogs)

For the Tempeh Bacon:

1/2 8oz/225g pkg Tempeh, very thinly sliced and diced into bite-size pieces.
1 1/2 T Tamari
1T Lemon juice
1/8 t Liquid smoke OR 1/4t smoked paprika
1 Clove garlic, minced
1T Olive oil
3-4 Drops liquid stevia OR 2-3t Agave/Maple syrup
1/4C + 1 T Water

For the Sauce:

1T Cashew butter
1/2T White miso
1/2T Tahini
1/8t Dijon mustard
1/8t Turmeric
Salt + Pepper
1/2C Almond milk, unsweetened
1/2C Vegetable broth
1T Arrowroot + 2-3T Hot Water

1/2C Green peas (fresh or frozen)

Enough Pasta for 2-3, any variety (I did 150g/1 heaping cup Brown Rice Fusilli which was enough for 3 modest servings)

1-2T Chopped Parsley

Prepare the tempeh bacon: Slice tempeh up, mix remaining ingredients in a large frying pan over medium heat and add tempeh.

Let simmer gently for approx 5 minutes until sauce begins to evaporate. Flip pieces over carefully and leave to brown for another 5 minutes. Flip tempeh one more time and cook the other side until brown and crispy. Turn off heat and set pan aside.

Prepare the pasta according to package instructions, in last couple of minutes of cooking time add your peas so they cook through. Drain, reserving 1/4 C pasta water.

While pasta is cooking prepare sauce:

In a medium pan over low heat whisk together ingredients on list up to and including salt and pepper. Gradually add milk and broth, whisking all the while to avoid lumps and produce a smooth sauce.

In a small bowl dissolve the arrowroot in the hot water. Gradually add this mixture to the sauce pan, keep whisking as it will thicken up pretty quickly. Continue to cook for a further minute until thick and creamy.

Add pasta, peas and tempeh pieces to the sauce pot, stir sauce through, cover and warm through for approx 5 minutes. If it looks a little dry add the reserved pasta water and continue to heat until warm and everything is nicely coated in the sauce.

Sprinkle with chopped parsley and serve.

Serves 2-3

Have you veganized any seemingly very un-vegan recipes?

What are your favourite Ricki recipes? If you’re unfamiliar with Diet, Dessert, and Dogs get over there now!

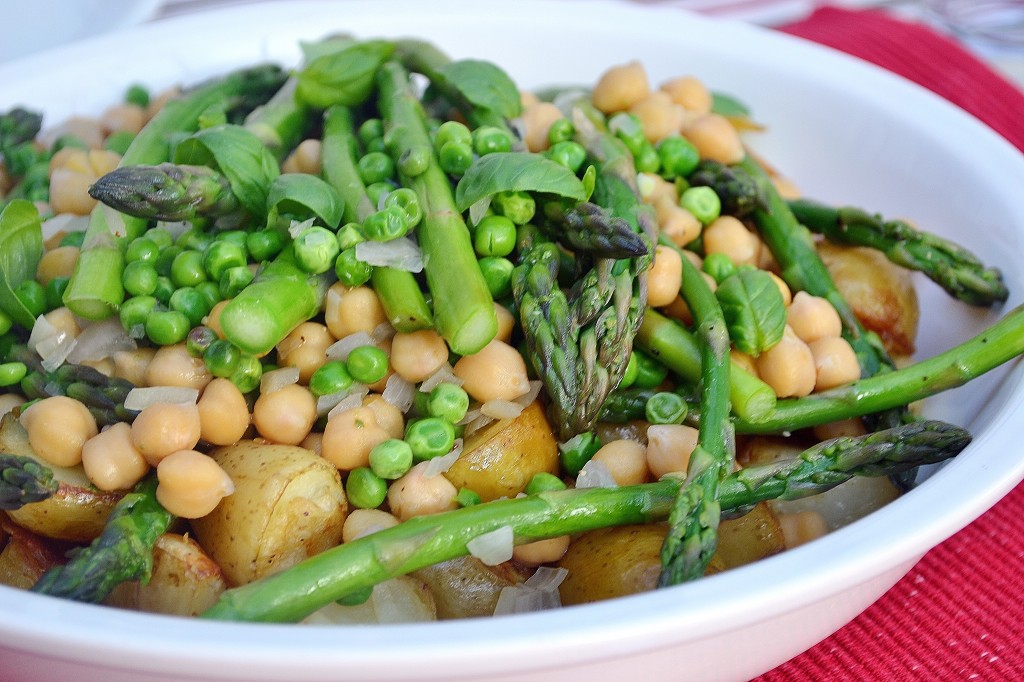
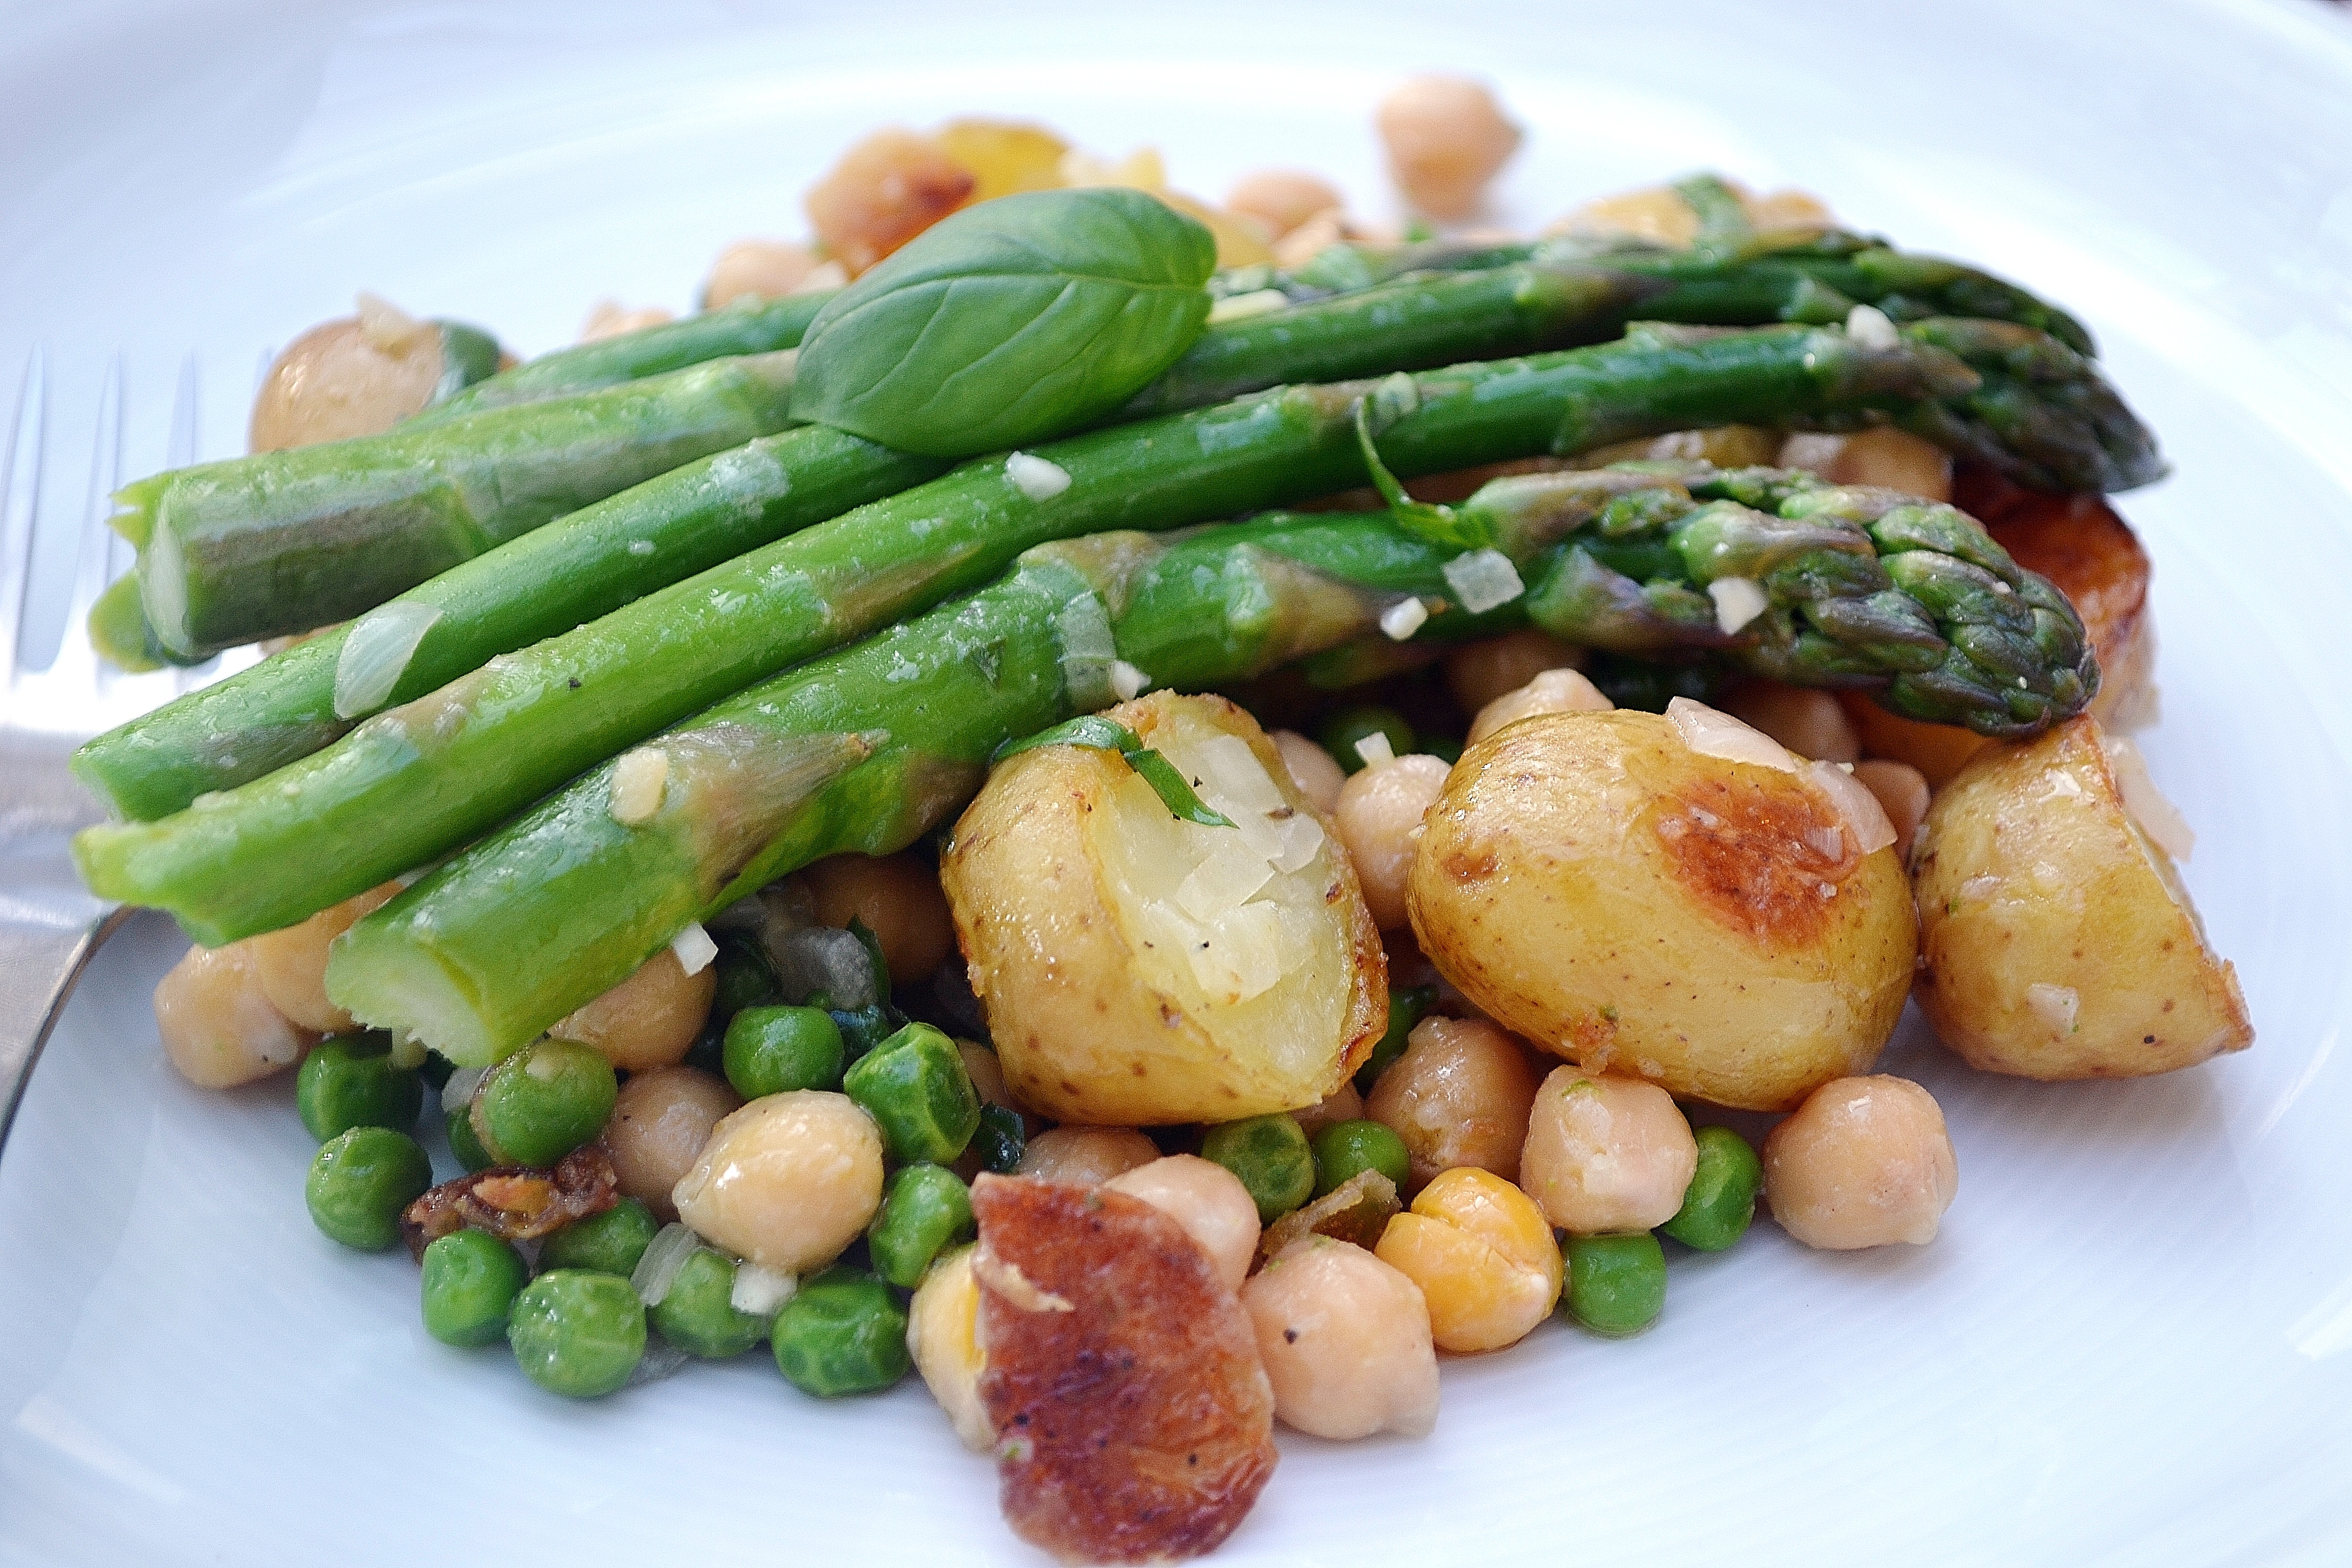
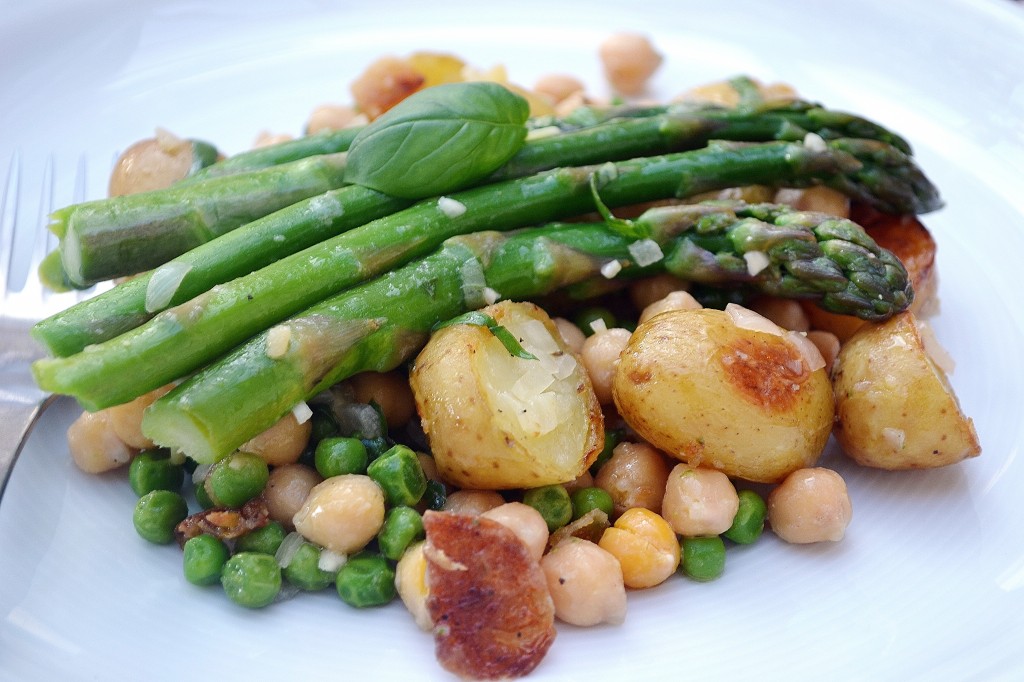
Roasted New Potato, Asparagus & Chickpea Salad with Lemon Basil Vinaigrette

Roasted New Potato, Asparagus & Chickpea Salad with Lemon-Basil Vinaigrette

Roasted New Potato, Asparagus & Chickpea Salad with Lemon-Basil Vinaigrette | coconutandberries.com

I’ve been seeing tropical fruits like avocados and mangoes, as well as an array of exotic vegetables all over the blog world recently.  But, instead of bemoaning their non-existence over here I shall celebrate the beautiful local produce we do have in this part of the world! New potatoes, fresh peas, asparagus and herbs all do particularly well in the UK.

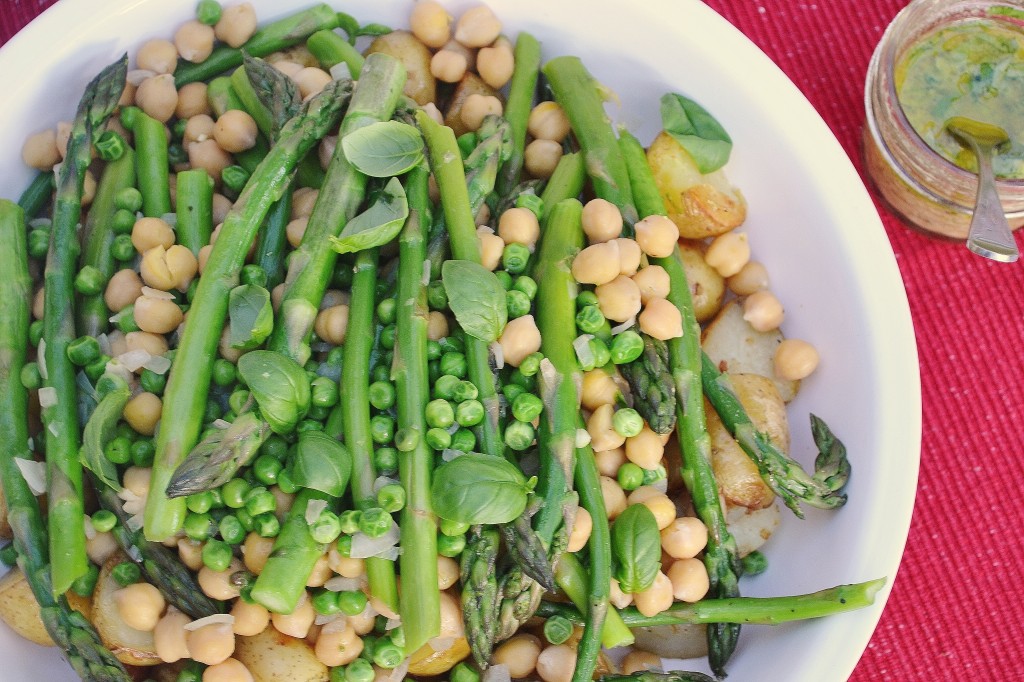
Potato salad is of course a classic summer dish but typically relegated to a side. As this meal was all about showcasing our lovely vegetables I opted to turn it into a main. Along with the vegetables, chickpeas add some protein power and a zippy lemon basil vinaigrette brings it all together.

Roasted New Potato, Asparagus & Chickpea Salad with Lemon-Basil Vinaigrette

I love it with roasted radishes too!

Pre-Dressed Salad:

Roasted New Potato, Asparagus & Chickpea Salad with Lemon-Basil Vinaigrette | coconutandberries

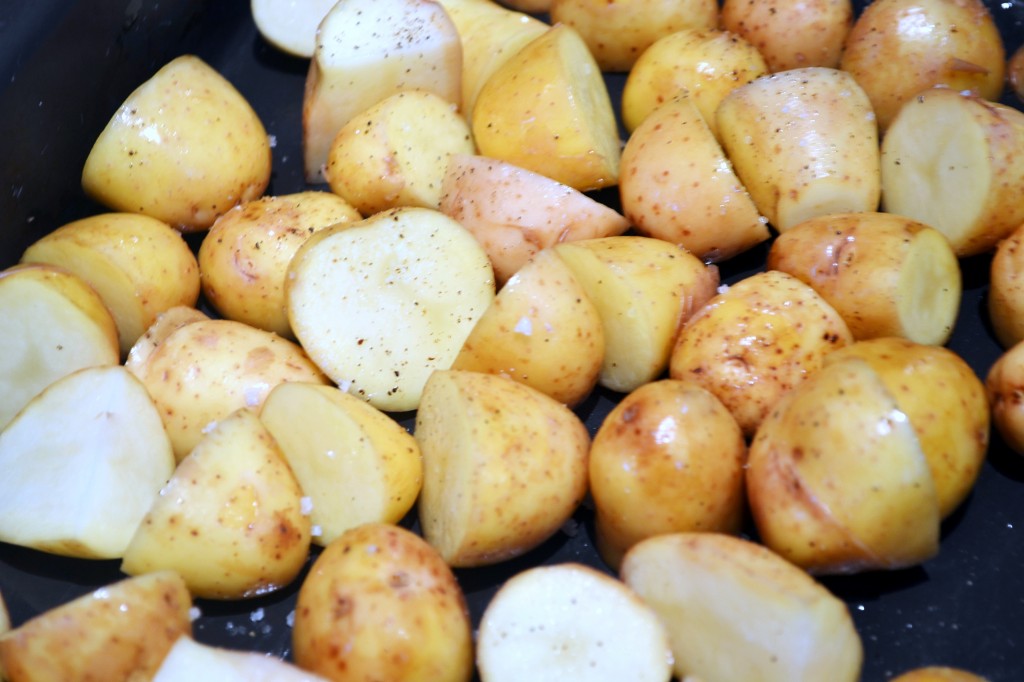
 New potatoes ready to roast- Steamed new potatoes are also delicious and would be a nice alternative to roasted, especially if you’re serving this as a cold salad.

Roasted New Potato, Asparagus & Chickpea Salad with Lemon-Basil Vinaigrette


Roasted New Potato, Asparagus & Chickpea Salad with Lemon Basil Vinaigrette

Yield: 4 Servings

Roasted New Potato, Asparagus & Chickpea Salad with Lemon Basil Vinaigrette

Ingredients

  • 650g New potatoes, halved
  • 1-2 Tbsp Olive oil
  • Coarse Sea salt (I like Maldon) + Pepper
  • 1-1/2 C Cooked chickpeas/ 1 Can, drained + rinsed
  • 1 Bundle (approx 350g/1lb) asparagus, tough ends snapped off
  • 2 Tbsp Water
  • 1 C Green peas (frozen are fine)
  • 2 Shallots, chopped finely
  • Vinaigrette:
  • 1 tsp Dijon mustard
  • 2 Tbsp Lemon juice
  • 2 Tbsp Extra-virgin olive oil
  • 1/4 C Fresh Basil, chopped coarsely or chiffonaded
  • salt + pepper to taste

Instructions

  1. Preheat oven to 180C/350F
  2. On a large baking tray toss new potatoes with olive oil, and a good sprinkle of coarse sea salt and pepper. Roast for 25-30 mins, stirring occasionally to prevent sticking. Edges should be crispy and golden (Alternatively steam new potatoes approx 15mins).
  3. Meanwhile, prepare dressing. Whisk together mustard and lemon juice and then slowly trickle in olive oil and keep whisking until emulsified. Stir through the basil and refrigerate until ready to use.
  4. Warm a large pan over medium heat with another drizzle of oil. Toss in asparagus along with 2T water, cover and cook for 4 minutes until bright green. Add peas, cover pan again and cook a further couple of minutes. If your peas are fresh add another couple of tablespoons of water to steam.
  5. When cooked, stir in chickpeas to warm through along with the minced shallots, just to take the sharp edge off them (you can also leave them raw if you like a bit of bite).
  6. Spread roasted new potatoes into a large serving dish in a layer then pour over the asparagus, chickpea & pea sauté.  Finish with black pepper and extra basil leaves.
  7. Either toss salad with dressing or serve on side for individuals to dress their own plates.
http://www.coconutandberries.com/2013/06/25/roasted-new-potato-asparagus-chickpea-salad-w-lemon-basil-vinaigrette/

I’m submitting this recipe to the weekly blog-hop Healthy Vegan Fridays

Roasted New Potato, Asparagus & Chickpea Salad with Lemon-Basil Vinaigrette | coconutandberries.com

What are your favourite local fruits and vegetables at this time of year?

Please sign up for email updates and join me elsewhere!  I’m on FacebookPinterestInstagram (@coconutandberries), Google + and Twitter! You can also follow Coconut and Berries with Bloglovin or Feedly.
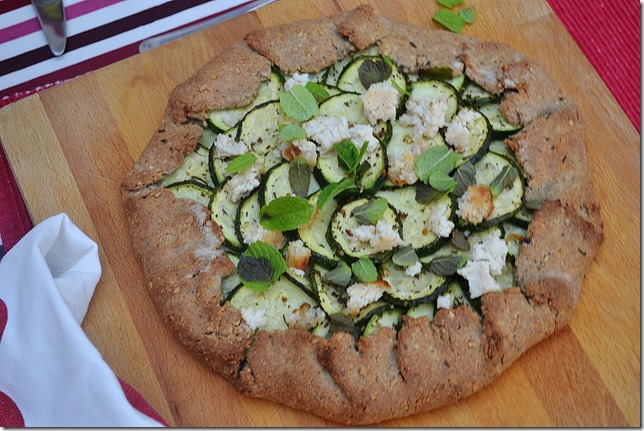
Herby Courgette Galette with Cashew “Chèvre”

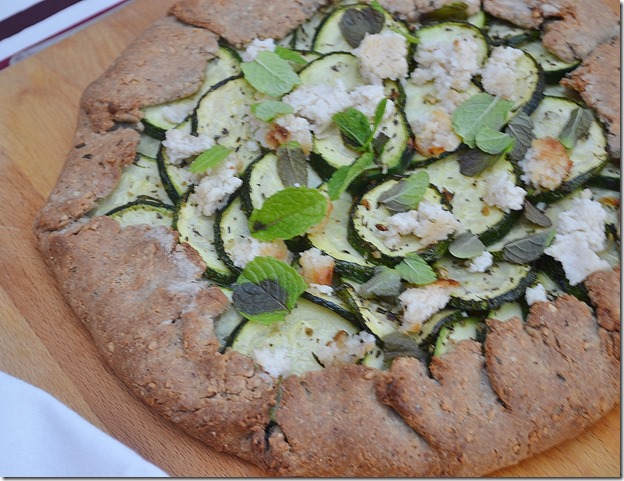
Herby Courgette Galette with Cashew Chevre

Readers are probably aware that the vegetable known in many countries as “zucchini”, here in the UK we call “courgette” . Besides being a Brit I had to keep the British (originally French) word for this recipe for the nice little ring to my recipe title!

Herby Courgette Galette with Cashew Goat's Cheese

It began with a bag of chestnut flour, a kind gift from an Italian friend who I cook with occasionally. He taught me to make castagnaccio, the traditional Tuscan (naturally vegan) cake made with chestnut flour, olive oil, rosemary, sultanas + walnuts or pine nuts. I love the stuff but I make my castagnaccio small and thin so my bag of flour has hardly been dented.

Looking for more chestnut flour recipes I stumbled across one which I’ve veganized here. The chestnut flour does have a wonderful taste, sweet and rich, but as it’s combined with other flours and ground toasted hazelnuts you could certainly sub another- I’d still recommend something equally flavourful, maybe spelt or buckwheat, or the original recipe suggests millet flour as another option.

The nutty crust encloses layers of sweet caramelized onions, tangy goat’s cheese and herby courgettes and there are even minced fresh herbs in the dough.

In place of the goat’s cheese I decided upon a cashew-based cheese. This recipe at C’est la Vegan had rave reviews and I’d made it before but unbaked, this time I went the whole hog and baked it so it would crumble nicely over the tart and in-between the layers.

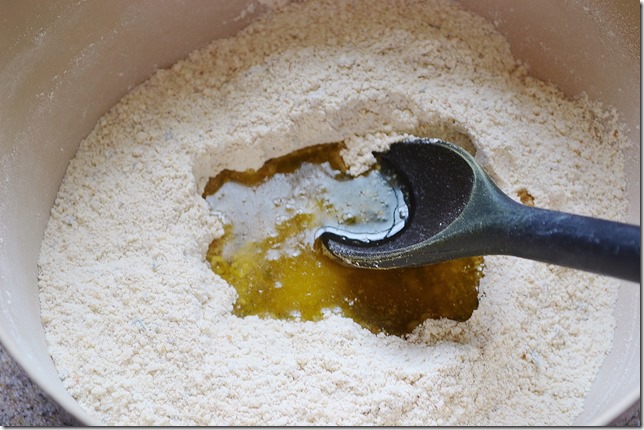
Galette Dough- Olive Oil, Chestnut Flour, Hazelnut Meal

Mixing up my dough

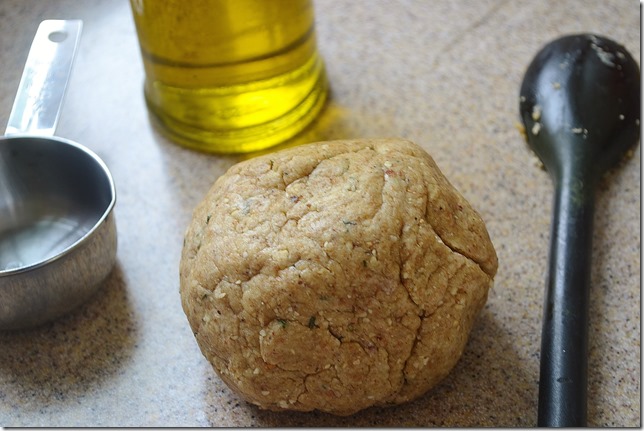
Galette Dough Ball

Ready to go in the fridge for a little resting time

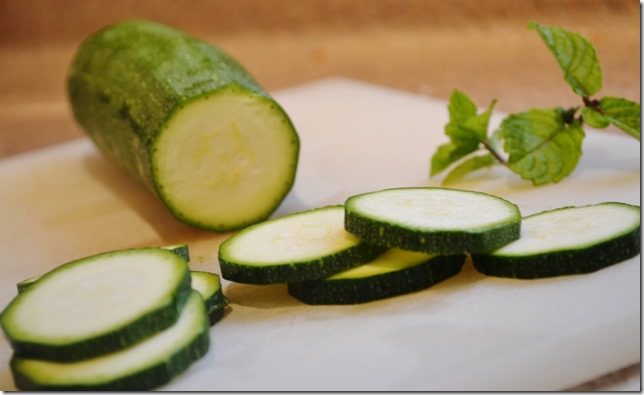
Sliced Courgettes and Fresh Mint

Sliced courgettes and fresh garden mint

Herby Courgette Galette with Cashew Chèvre:

Adapted from Frenchie and the Yankie

Crust

1/2C Whole hazelnuts (to give 3/4C ground)
1/2C Chestnut flour
1/2C Wheat flour
3/4 C Whole wheat flour
1/2t Salt
3 Sprigs Rosemary
1/2C Water
1/4C Olive oil

Lay hazelnuts on a baking tray and toast at 180C/350F for approx 10mins (careful they don’t burn!). Wrap in a kitchen towel and rub vigorously together to remove most of their skins.

Leave to cool while you measure out the other dry ingredients into a large bowl. Pulse the nuts in a food processor with the rosemary until coarsely ground (you still want a little texture).

Add ground nuts to the bowl with the other dry ingredients and mix well. Make a well in the middle, pour in oil and gradually add water bit by bit until you can form the mixture into a ball. You might not need all of the water.

Wrap up the ball of dough and refrigerate for at least an hour. N.b. Remove from fridge to come to room temperature 30 mins before rolling it.

Caramelized Onion:

1T Olive oil
1 Large onion, very thinly sliced
1t sugar
Good pinch of salt

Heat oil over medium-low heat in a large frying pan and add onions. Cook gently for approx 5 minutes until beginning to soften, then sprinkle over sugar and salt. Spread into a thin layer and continue to cook on low for a further 20 minutes, stirring frequently. The onions should be nice and caramelized and again may need more or less cooking time depending on your stove/pan etc.

Set aside in a bowl.

Herby Courgettes

2 Medium courgettes, thinly sliced (1/2 cm)
2 Cloves garlic, minced
1t Dried oregano (or 1T fresh if you can get it)
1T Finely chopped rosemary

Using onion pan cook garlic and herbs for a couple of minutes over medium heat.

Toss in courgettes and spread in a single layer. Cook for a few minutes before flipping and cooking on the other side. Remove from heat when beginning to soften but still crisp.

Set aside.

Putting Galette together

You will need your dough, caramelized onions, courgettes, 1/2 Recipe Cashew Chèvre ( I made the whole recipe and had some leftover, but use as much as you like), fresh mint.

Roll out dough to a circle approx 30cm in diameter on a large piece of parchment paper. Don’t worry if the edges are a little rough, it’s supposed to be rustic-looking!

Spread caramelized onions over, leaving a border of 1-2 inches. Next crumble over half your chèvre. Finally, arrange courgette slices working in overlapping circles, covering onions and chèvre. Fold edges over courgette, crimping as you go.

Lift up sides of parchment paper and place the whole thing on a large baking tray.

Put it back in the fridge for 15-30 minutes.

Preheat oven to 180C/350F. Cook galette for 30 minutes- edges should be golden and crunchy.

Leave to sit for a few minutes (if you have the patience…), sprinkle over remaining chèvre and mint leaves.

Serves 4-6

Herby Courgette Galette with Cashew Goat's Cheese

This turned out far better than I could have imagined, and although there are a few stages so it does takes some time, it was so worth it. I’m also sort of presuming that if you’re reading you probably like to spend time in the kitchen too!

So, who out there has used chestnut flour before? More ideas very welcome.

Digging into my bag has reminded me I need to get in touch with my Italian friend and organize another cooking session… Maybe I’ll pick up some traditional Italian recipes to share on the blog!