Coconut and Berries

Healthy, Vegan Recipes by Emma Potts

  • 
  • 
  • 
  • 
  • 
  • Home
  • About
  • Contact
  • Recipes
    • All Recipes
    • Beverage
    • Breakfast
    • Dessert
    • Dips and Sauces
    • Main Dish
    • Salads
    • Snacks
    • Sides and Starters
    • Raw
  • Press
  • Inspiration
  • Reviews
    • Product Reviews
    • Restaurant Reviews
    • Cookbook Reviews
    • Recipe Reviews

E is for…

E is for…

Edamame!

I know my A-Z series is pantry ingredients not fresh fruit and vegetables, but I decided edamame count as I buy the frozen packaged kind Smile . My blog, my rules!

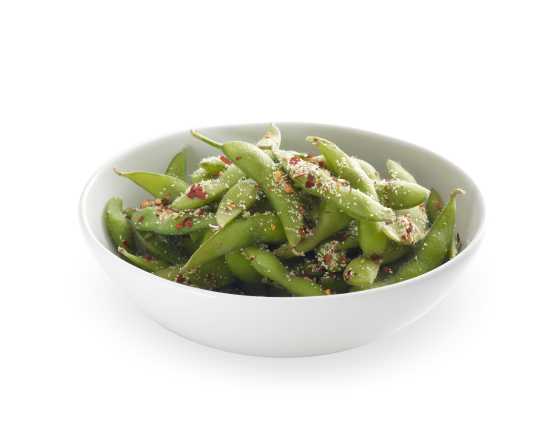
I love edamame but always forget to use them…probably because they’re in my freezer and not as visible as the veg in my fridge’s crisper drawer. But, I had lunch at the Japanese noodle restaurant chain Wagamama a few days ago where one of the sides on offer is simply a bowl of salted, steamed edamame and it reignited my passion for these little green beans.

edamine

I can’t seem to find them still in their pods unfortunately but they’re more convenient for a variety of recipes in their podded form anyway. I’ve used them in a few recipes on the blog so far- My Summer Vegetable + Chickpea Sauté, 10-minute Raw Peanut Noodles, and my favourite Cauliflower Fried “Rice” with Grilled Tofu. I’m still mad about dips so thought I’d make something similar to my Broad Bean + Roasted Garlic Dip but using edamame.

Edamame-Pea Dip + Tofu Ricotta Toasts

I opted to fancy up this lunch staple a little with the addition of a second spread for my toasts- tofu ricotta. The slightly salty, tangy ricotta is a lovely contrast to the sweet edamame-pea dip, but if you’re pushed for time then the latter is still very yummy on its own.

Edamame-Pea Dip + Tofu Ricotta Toasts

Edamame-Pea Dip + Tofu Ricotta Toasts:

1C Frozen edamame
1C Frozen peas
1Clove of garlic, minced
1T + 1t Olive oil
1/2T Tahini
1T Lemon juice
1/8t Salt
1 1/2T Fresh mint leaves

Steam the peas and edamame for approx 3 minutes then plunge into cold water to stop cooking and retain bright green colour. Set aside in a bowl.

Heat the teaspoon of olive oil in a small pan over medium and when hot add minced garlic. Cook, stirring for a minute just to take the raw garlic edge off. Add garlic to edamame and peas and add remaining olive oil, tahini, lemon juice and salt. Using an immersion blender blitz the mixture until you have a fairly smooth purée. You can also use a food processor for this. Finally add the chopped mint and pulse through.

Tofu Ricotta (For Soy-free use Cashew ricotta)

(Adapted from Veganomicon)

1/2 400g/14oz pkg Firm tofu
1 1/2T Lemon juice
2T Nutritional yeast
1/4t Salt
1t Olive Oil
1 Clove of garlic, minced
1/4t Dried basil (optional)

Using your hands crumble up tofu and squish between your fingers until you have a ricotta-like texture. Stir through remaining ingredients and taste for salt.

Spread toast with a generous layer of the tofu ricotta, followed by a good dollop of the edamame-pea dip. Serve alongside a big salad for lunch or make crostini with the spreads and serve as appetizers.

Edamame-Pea Dip + Tofu Ricotta Toasts

A few more edamame recipes to try:

If you’ve still got peaches where you are try these Portland Porch Lettuce Wraps which use edamame pesto, from Isa at the PPK.

These Vegan Sushi Rolls with Sticky Walnuts and Edamame also look fantastic.

You could thrown them in a veg-loaded hummus wrap.

Or, if you’re in the mood for something a little more wacky…how about these Teriyaki glazed Brown Rice and Edamame Burgers?

Vegan MoFo Banner

September 5, 2013 —

Smoky Black Bean Empanadas with Chipotle Sour Cream

Smoky Black Bean Empanadas with Chipotle Sour Cream

When I was younger and living in London, pre-theatre dinners or family get-togethers would often be a meal at an Argentinian steak restaurant, the Gaucho Grill. Of course, there’s no way I’d go there now (although I think it’s still one of my brother’s favourite places to eat…) , it must be the most un vegan-friendly place going- not just the menu but the décor too- the restaurants are all fitted out in black leather with cow hide furnishings everywhere! The one good thing I take from our visits though is the memory of empanadas.

Smoky Black Bean Empanadas with Chipotle Sour Cream

If you’re unfamiliar with empanadas, they’re popular street food in South America and are essentially flaky pastry pockets filled with a whole variety of fillings, often cheese, meat, and beans. For my vegan version I decided on a smoky, spiced black bean and vegetable filling and served them with a chipotle sour cream for a nice creamy contrast.

I ate a few for dinner alongside a fresh garden salad, but, like my beetroot falafel, they’re also great party food.  Pile up plates with the pastries, serve the sauce in a dish on the side and your guests can eat them with their hands.

Smoky Black Bean Empanadas with Chipotle Sour Cream

This recipe is rather time-consuming but it does make a lot. They are very moreish though so you might end up eating more than you anticipate! You can also freeze them either before or after baking and reheat or cook in the oven from frozen.

Smoky Black Bean Empanadas with Chipotle Sour Cream

Smoky Black Bean Empanadas with Chipotle Sour Cream:

For the Dough:

(Adapted from Viva Vegan! )

3C Flour ( I was using up odds and ends from the pantry so used a mixture of rye, spelt and cornmeal!)
1 1/2t Salt
1/4t Baking soda
7T Coconut oil, chilled
3/4C or more cold water

Non-dairy milk for brushing

Using a food processor pulse flour salt and baking soda together. Add solid coconut oil to the food processor and pulse again until the mixture resembles fine breadcrumbs. Remove mixture to a large bowl and stream in cold water while mixing with fingers. Add just enough water until dough comes together but is not sticky. Knead a few times, divide into 4 balls,  flatten each into a thick disc, wrap tightly in cling film and chill in the fridge for a minimum of 4 hours.

For the Filling:

1T Olive oil
1 Onion, diced small
2 Cloves of garlic, minced
1 Red pepper, diced small
1 Medium courgette, diced small
1 1/2C (1 Can) Black beans
1/2t Salt
1/2t Cumin
1/2t Mild chili powder
1/2t Smoked paprika
1/4-1/2t Liquid smoke (If unavailable use a bit more smoked paprika)

Warm the olive oil in a large skillet over medium heat. Add onion and cook, stirring, for a couple of minutes. Add garlic, red pepper and courgette and continue to cook until soft, approx 5-8 minutes. Add black beans, salt and spices and stir to coat everything well. Turn off heat and set aside until you’re ready to fill your empanadas.

Note: Feel free to mix up the filling ingredients. I think corn would be a nice addition, crumbled tempeh, or maybe plantain?

Chipotle Sour Cream:

1/2C Cashews, soaked
1/4C + 2T Water
1T Chipotle chili in adobe sauce (I puree the cans and store in the freezer and break off a piece when needed)
1 Clove of garlic
1t Apple cider vinegar
1/4-1/2t Salt
Squeeze of lime juice

Blend everything together (a short-cup/personal blender is ideal for small amounts like this). Taste for salt.

Putting it together:

Preheat oven to 190C/375F

Remove dough from fridge and roll out a disc of dough between two sheets of parchment paper into a circle about 1/8” thick. Using a bowl as a guide, cut out circles of approx 4-5” diameter (you can make them bigger if you prefer but that’s the size I went for). Cover and keep cool while you repeat with the next dough disc. Gather up all the remaining dough scraps, re-roll only one more time and cut out as many circles as possible.

Place approx 1 1/2T filling in the middle of each circle, dampen edge with a wet finger and fold one side over the filling. Roll, braid or crimp edge to seal (It took me a while to get the hang of this but I found simply rolling the edge in was the easiest). Place on a lined baking sheet and brush lightly with non-dairy milk. Repeat process until all empanadas are filled- I had a little filling left.

Bake for 30-35 minutes, turning baking sheet half-way through cooking process to ensure even browning. Let cool for a couple of minutes and serve warm with chipotle sour cream.

I’m submitting this recipe to the weekly blog link-ups Wellness Weekends,  Healthy Vegan Fridays and Meatless Mondays

Smoky Black Bean Empanadas with Chipotle Sour Cream

Britain doesn’t have much of a tradition of street-food, although, in London especially, street food from other countries is getting really popular.

Where you live do you have street-food stalls available to you?

August 30, 2013 —

Grilled Peach, Courgette & Walnut Salad

Grilled Peach, Courgette & Walnut Salad

Grilled Peach, Courgette & Walnut Salad |coconutandberries.com

Last week in Edinburgh was probably the first time in weeks that I’d eaten an apple. During the summer I try to eat as much seasonal produce as I can and since it will be back to apples before long there’s no room for them in my diet right now!

Peaches are one of my favourite summer fruits and I tend to enjoy them on their own, best eaten standing over the kitchen sink with juice running down your chin, but I have started trying them in different ways more recently.

I loved the nectarine/peach salad with blackberry dressing, basil, and hazelnuts I made last month and decided on anothe- a Grilled Peach, Courgette & Walnut Salad.

Grilled Peach, Courgette + Walnut Salad

I’m still struggling to keep on top of the supply of courgettes from the garden. Although initially I was cross when I discovered the muntjac deer were sneakily munching our vegetables during the night, I ended up grateful for some help in eating them!

As well as being very tasty, this grilled salad used 3 courgettes, a nice bonus, for me at least.

It would make a lovely side dish or starter salad, or enjoy it for lunch just as is. Grilling the fruit and vegetables brings out their natural sweetness and some fresh herbs and nuts finish it off nicely. I loved walnuts in this and don’t use them enough, but if you’d prefer another kind just swap them in.

Grilled Peach, Courgette + Walnut Salad

Print
Grilled Peach, Courgette & Walnut Salad

Yield: 2 Servings

Grilled Peach, Courgette & Walnut Salad

Ingredients

  • 3 Medium-sized courgettes
  • 2 Peaches
  • 1 Tbsp Olive oil
  • 2 Tbsp Chopped parsley
  • 2 Tbsp Chopped mint
  • Salt + pepper
  • 3 Tbsp Toasted walnuts, roughly chopped
  • 1/2 Tbsp Red wine vinegar
  • 1/2 Tbsp Extra-virgin olive oil (optional)

Instructions

  1. Slice courgettes into thin slices vertically using a sharp knife, discarding the very outside slices.
  2. Peel, remove stone, and quarter peaches.  Preheat a stove-top grill pan (or use an outdoor grill) and brush courgette slices and peaches with the olive oil. In batches, grill the courgettes for approx 3-4 minutes on both sides. Try not to move them while they cook so they get nice dark grill marks. Set aside in a bowl while you grill the peach quarters.These are obviously more delicate and only need about 2 minutes on each side.
  3. Season courgettes well and toss with red wine vinegar and fresh herbs. Transfer to a serving dish, place grilled peach quarters on the top, sprinkle with walnuts and drizzle with extra olive oil if using.

Notes

I grilled an extra peach while I was at it and it was fantastic with non-dairy yogurt and a little drizzle of maple syrup for dessert.

3.1
http://www.coconutandberries.com/2013/08/19/grilled-peach-courgette-walnut-salad/


If you’re growing vegetables this year or get a veg box/csa delivery are you being overwhelmed by an abundance of any in particular?

If you’re new to Coconut and Berries, Please sign up for email updates and join me elsewhere: I’m on Facebook, Pinterest, Instagram (@coconutandberries), Google + and Twitter!

Follow Coconut and Berries with Bloglovin or Feedly. 

August 19, 2013 —

Broad Bean + Roasted Garlic Dip

Broad Bean + Roasted Garlic Dip

Broad Bean (Fava Bean) + Roasted Garlic Dip

As much as I love to be in the kitchen, for almost everyone, myself included, it’s just not feasible to spend a huge amount of time preparing meals on a day-to-day basis. I almost always carve out some precious time in the evenings to prepare a nice dinner, and at weekends might make a special breakfast, but lunch tends to be variations on a theme- quick, light meals I can eat for a few days in a row. I’ve shared a few recipes for satisfying bean/grain salads on the blog already- a typical lunch for me. But besides salads, and leftovers, you’ll almost always find some sort of dip in my fridge.

Hummus is probably a staple in most vegans’ diets! It’s certainly one of those foods which deserves the tittle “nutritious and delicious”. I frequently whip up a batch of the traditional stuff but, if you know me you’ll realize It’s rare that I repeat the same dish too many times as I have to much fun making and inventing new ones! This broad bean and roasted garlic dip is a lovely alternative to the usual hummus and just as easy to prepare.

Roasted Garlic

For some depth I added roasted garlic to my dip. If you’ve never tried garlic this way I urge you to do so asap. It’s a different flavour altogether to raw or even sautéed garlic. The sharp, pungent taste mellows completely and it turns caramel-like, sweet and spreadable, and, even better, no garlic breath! When making roasted vegetables I often toss a few whole cloves to the mix, still in their skins, and then squeeze out the sticky garlic when cooked and mix it with the other vegetables.

Fresh Fava Beans

Broad beans are another vegetable we tend to think of here as a classic summer ingredient. I love how creamy and perfect they look popped out of their thick pods. They always remind me of a song we sang at school when I was little “..the apples are ripe, the plums are red…the broad beans are sleeping in their blankety bed” and while I was shelling them I noticed that the pods were indeed lined with a kind of velvety “blanket”!

Anyway, we went to a local pick-your-own-farm recently to get a load of berries and I couldn’t resist filling a basket with fresh broad beans at the same time. I’ve never really cooked with them before so this was my easy, but delicious solution. If you’ve got any other ideas for using the fresh beans please do share in the comments!

Broad Bean + Roasted Garlic Dip:

Bear in mind when buying fresh broad beans that after shelling them you’re left with a fairly small amount. I recommend buying more than you think you’ll need!

200g/1/2lb Shelled Broad Beans
1 Small bulb of garlic
2T Extra-virgin olive oil
Zest of 1 small lemon
2T Lemon juice
5 Medium basil leaves
Salt + pepper

Preheat oven to 180C/350F. Slice whole bulb of garlic in half width-wise across its centre and place, exposed side up on a baking tray. Drizzle with olive oil and cook for 20-30 minutes. It should be soft throughout and slightly brown. Be careful not to let it burn though- you want caramel not char. Set aside until cool enough to handle.

Meanwhile you can be getting on with shelling your beans. When they’re podded steam them for 3-5 minutes and plunge into cold water. Remove the thick skins from the beans. Just pinch the skin with your fingers and they should pop out easily.

Squeeze as much of the garlic as you can out of the skins and blend together with all the other ingredients In a food processor. Season to taste.
Serve at room temperature with raw vegetable sticks, wholegrain bread, pita or crackers.

I’m submitting this recipe to the weekly blog hop Wellness Weekends

What are your favourite easy lunches?

August 7, 2013 —

Summer Rolls (+ Sprouting)

Summer Rolls (+ Sprouting)

(If you follow me on Instagram (@coconutandberries) or on Facebook, you might have had a little sneak preview of these beauties. If not, let’s connect! )

I associate “spring rolls” with the appetizer you find in Chinese restaurants. A greasy, fried pastry of sorts with some indistinguishable vegetable filling. Not something I want to be eating anyway. I know the uncooked, cold rolls are sometimes called “spring rolls” too, but I’m sticking with “summer rolls” for mine so they have none of those connotations.  Besides, they’re so colourful that they’re perfectly summery!

Summer Rolls (Packed with good stuff) + Sprouting

I’m a huge fan of beans and legumes and another way to enjoy them is sprouted! You can sprout almost any seed, legume or grain and eat them raw. They’re incredibly healthy- packed with fibre, protein, vitamins, minerals and beneficial enzymes, not to mention they taste delicious. You might be a little intimidated by the process but I promise it’s so easy and you don’t need any fancy equipment. Here’s a great guide, including a video.

It’s pretty fun watching the little tails grow and the sprouts come alive! If you don’t have a garden or are too impatient to grow vegetables, sprouting is perfect for you, as within a couple of days your sprouts will be ready to eat.

You can eat them any way you like- add them to salads, make raw hummus from sprouted chickpeas. Sprouted grains like buckwheat and quinoa are delicious for breakfast too, eaten like cereal with non-dairy milk and fruit.

Lentil Sprouts (Sprouting)

I opted for lentil sprouts this time as I had a nearly-finished bag of green lentils I wanted to use up. They added the perfect crunch and boost of nutrients to my summer rolls.

Fruit, Veggies + Sprouts for Summer Rolls

Mise-en-place is important when making your rolls. It makes life much easier if all your ingredients are ready before you get going. Let your imagination be your guide with your choice of fillings. Fresh herbs are not optional in my opinion though as they really bring these to life. As you can see from the picture below, I changed my mind at the last minute and added some sliced avocado for a nice texture contrast.

Summer Rolls (Packed with good stuff) + Sprouting

The Best Summer Rolls:

3/4C Shredded carrot
3/4 Shredded beetroot
1/4C Fresh coriander (leaves only)
1/2C Lentil sprouts
1/2 Medium mango, thinly sliced
1/2 Small avocado
Sriracha
Lime
Rice Paper Wrappers (I got mine from a local Asian store but you should be able to find them in health-food stores and supermarkets too)

Peanut-Ginger Sauce

This is a variation on the sauce I used for my 10-minute Raw Peanut Noodles, but a mini batch, just enough for these rolls.

1T Peanut Butter
1T Non-dairy milk
1/2t Tamari
1/2t Lemon/lime juice
1/2t Agave nectar
1/2t Grated fresh ginger
Dash of cayenne

As mentioned, have all your filling ingredients chopped and prepped.

Fill a large shallow dish with warm water (bath temperature). Dip one rice paper wrapper in the water and leave a few seconds to soften it. Rice paper rolls vary hugely in size and thickness but don’t leave it in there too long. It should still be slightly firm because when you lay it out it will continue to absorb the water on its surface. Lay wrapper carefully on a flat surface, being careful not to get it stuck to itself (It might take a couple of tries before you get the hang of it- they are very delicate).

Layer your fillings down the centre of the rice paper circle, make sure you’ve got a bit of everything in there. Add a little sriracha and a squeeze of lime if you like. Fold the ends over the filling and then tightly roll the sides around to create a parcel.

Repeat until all your fillings are used up.

Whisk together ingredients for sauce and serve alongside rolls for dipping.

(Makes 4 large Rolls/Serves 1)

It’s like a salad in held-held form! These make a great packed lunch as they travel well but don’t keep them in the fridge for more than a few hours as the wrappers tend to harden up.

Summer Rolls (Packed with good stuff) + Sprouting

Have you tried sprouting or making spring/summer rolls before?

What are your favourite sprouts?

August 5, 2013 —

  • « Previous Page
  • 1
  • 2
  • 3
I’m Emma, a passionate vegan foodie sharing my kitchen adventures and healthy plant-based creations. Hope you stick around!

Follow on Bloglovin

Make sure you never miss a recipe. Subscribe here!

Enter your email address to subscribe to this blog and receive notifications of new posts by email.

Tasty Food Photography eBook.
Froothie Optimum 9400
Vibrant Life Cleanse Program & Cookbook

Tags

Almond Milk Almonds Appetizer Avocado Baked Banana Basil breakfast Carrots Cashews Chickpeas Chocolate Cinnamon Coconut Coconut Milk Coconut Oil Coriander Courgette Dates Dessert Ginger Gluten-free Kale Lemon Lentils Lunch Main Dish Mint Oats orange Parsley Quinoa Raw Red Pepper Review Salad Salad Dressing Side-dish Smoothie Snack Tofu Tomatoes Vegan Vegan MoFo Walnuts

Follow Coconut and Berries on Instagram

Vegan Woman Top Vegan Blogs to Watch 2014 Winner

Latest Recipes

  • Update + Coconut and Berries in 2016
  • Courgetti Salad with Cherry Tomatoes, Grilled Corn & Herby Dressing
  • A Vegan Dinner Party with La Belle Assiette
  • Plant-Powered Families: Review & Double Chocolate Orange Banana Muffins
  • Red Lentil, Spinach & Potato Curry with Baobab [& a Giveaway!]

Popular Recipes Lately

Lemony Lentil, Potato & Pea Curry
Choosing Raw: The Book
Sweet & Smoky Tempeh Fajitas (with Black Bean-Lime Dip)
Polenta-Olive Tapenade Bites
"Cheesy" Leek & Broccoli Tartlets (Vegan, Gluten-free, Soy-Free)
Optimum 600 Juicer - Froothie
Ad
  • About
  • Contact
  • Inspiration
  • Recipes
  • All Recipes
  • Reviews
Copyright © 2013 Emma Potts and Coconut and Berries . Unauthorized use and/or duplication of this material without express and written permission from this blog’s author is strictly prohibited. Excerpts and links may be used, provided that full and clear credit is given to with appropriate and specific direction to the original content.
Coconut and Berries is a participant in the Amazon Services Associates Program, an affiliate advertising program designed to provide a means for sites to earn advertising fees by advertising and linking to Amazon.com.

Copyright © 2019 · Coconut and Berries · Designed By Beautiful Dawn Designs