Review & Giveaway: Super Healthy Snacks and Treats

“More than 60 easy recipes for energizing, delicious snacks free from gluten, dairy, refined sugar and eggs”. Sounds pretty good doesn’t it?

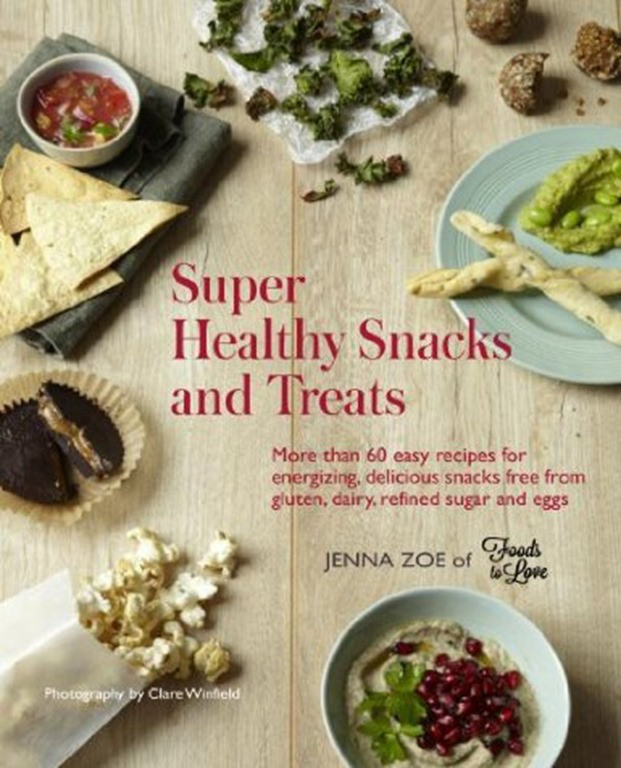
Well it is! “Super Healthy Snacks and Treats”, published earlier this year by Ryland Peters & Small, was written by Jenna Zoe, the founder of Foods to Love, the nutrition and recipe blog and online healthy products store. I discovered Jenna and her book via Instagram and was really excited to get my hands on a copy. It’s especially fantastic to see a UK-authored book of this kind. It seems the plant-based, healthy living scene is finally catching on here!

Super Healthy Snacks and Treats, Jenna Zoe

Facing nutrition information overload, I’m sure something a lot of us can relate to, Jenna set out to find a simple way of eating which left her feeling good. Her criteria for the foods she was going to eat were that:

- They had to be natural, whole foods that were minimally processed
- She had to love how they tasted.
- They had to suit her system. She paid close attention to what made her feel best.

The result of the experiment is this book! Jenna hopes to inspire us to make our own healthy eating guidelines and feel empowered to take the best care of ourselves.

All the dishes in the book are packed with nutrition, not to mention taste, colour and fun!

Most of the recipes are very easy to make with a few longer ones which look a little extra fancy, ideal for special occasions. I was familiar with almost all the ingredients and don’t think any listed are particularly uncommon, especially if you already avoid dairy and refined sugars and flours and are used to alternatives.

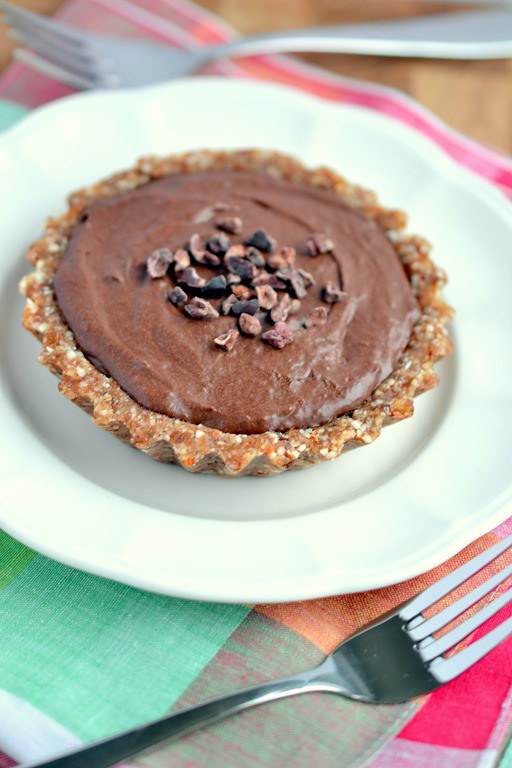
Raw Mint Chocolate Tartlets

As well as the recipes there’s lots of useful information in here: a guide to essential ingredients and substitutions, tips and tricks, a how to use the book feature and Jenna’s “principles of healthy snacking”.

The recipe chapters are divided into Breakfasts, Power Snacks, Party Snacks, Dips & Dippers, Sweet Bites & Cookies & Bakes so there’s something for any time of the day.

Each recipe is accompanied by a little intro, where you’ll find more nuggets of useful info, and beautiful pictures which will make you want to get in the kitchen pronto!

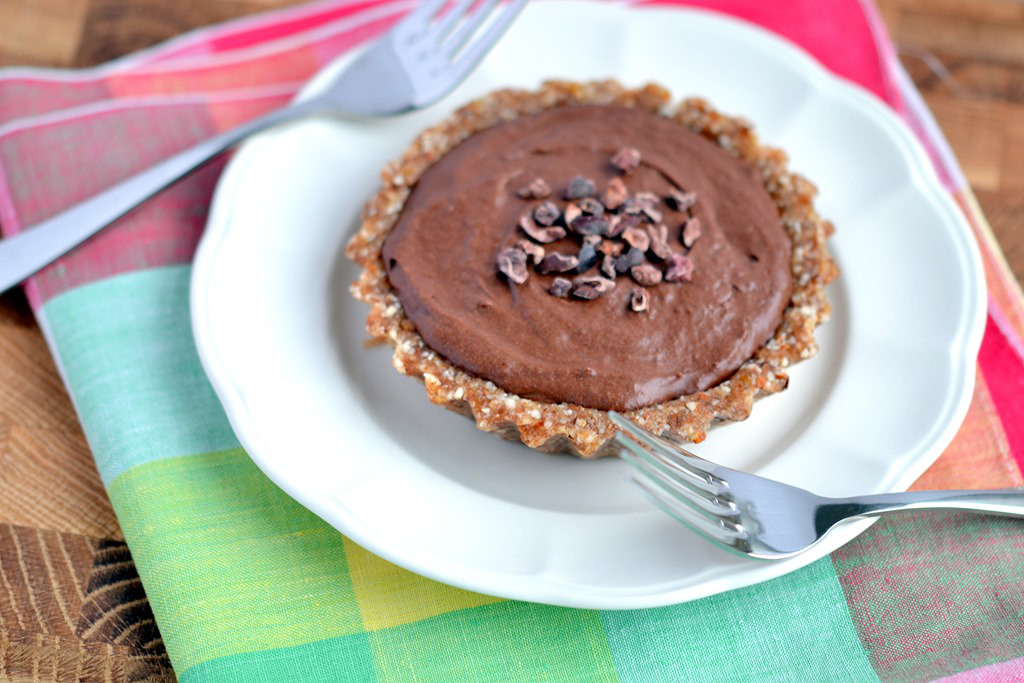
Raw Mint Chocolate Tartlets

This here is one of the insanely delicious Raw Mint Chocolate Tartlets. I don’t need to tell you again of my love for raw desserts but this one is honestly one of the best I’ve had. Even better is that they take less than 10 minutes to put together and only need 15 minutes to set. They are very rich so I’d recommend sharing one!

The publishers have generously allowed me to reprint this recipe here for you all to try immediately:

Raw Mint Chocolate Tartlets:

(Makes 4)

145g/1C Almonds
135g/3/4C Dates, stoned
2T Unsweetened Desiccated Coconut, OR more almonds
a pinch of salt
2t Coconut Oil

Mint Chocolate Filling

(to fill 2 tarts) *Note, the book also lists a key lime filling to fill the other 2 tart shells. Either double the filling for 4 tarts or halve the crust mixture for 2)

1 Large Banana
60ml/1/4C Coconut Oil
60ml/1/4C Pure Maple Syrup
40g/1/3C Unsweetened Cocoa Powder
6 Fresh Mint Leaves OR 1/2t Mint Extract

Put the almonds in a food processor and blitz until crumbly. Add the dates, desiccated coconut, salt and coconut oil and pulse until a smooth mixture forms. Remove the dough from the processor and divide it into 4. Press each portion into a tartlet mould so that it neatly lines the base and sides of the mould. Ideally you want the tartlet cases to be about 1cm/1/2inch thick all the way around, with plenty of room for the filling. Don’t worry if you have a little extra dough- you can roll this into bite-size energy balls and save for a healthy snack later on.

For the filling, make sure the coconut oil is liquid. If it isn’t put it in a saucepan over low heat and allow to melt. Allow to cool completely, otherwise the hot oil will start to cook the other ingredients in the filling,

Place the filling ingredients in the food processor, one set at a time, and blitz until smooth. Divide each filling between 2 tartlet cases and freeze for at least 15 minutes to set.

Raw tarts will keep, in the freezer, for up to 2 weeks, so they’re a great make-ahead option for tea and dinner parties.

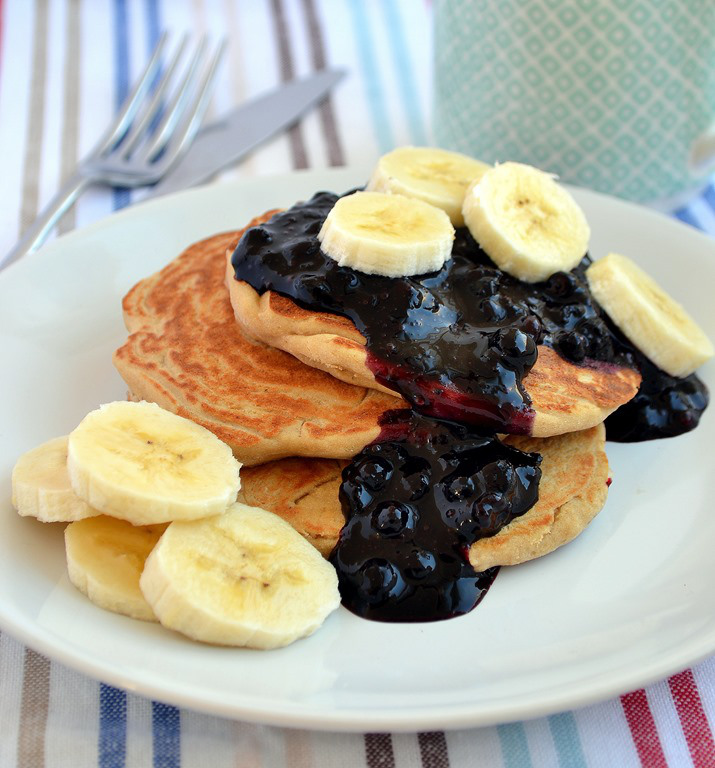
Vegan Protein Pancakes

Next up, Protein Pancakes. If there is a pancake recipe in any new cookbook I get then that will most likely be the first I try! These are made from gluten-free flour and a dose of vegan protein powder and were light and fluffy but very filling too. I’ll be making these regularly.

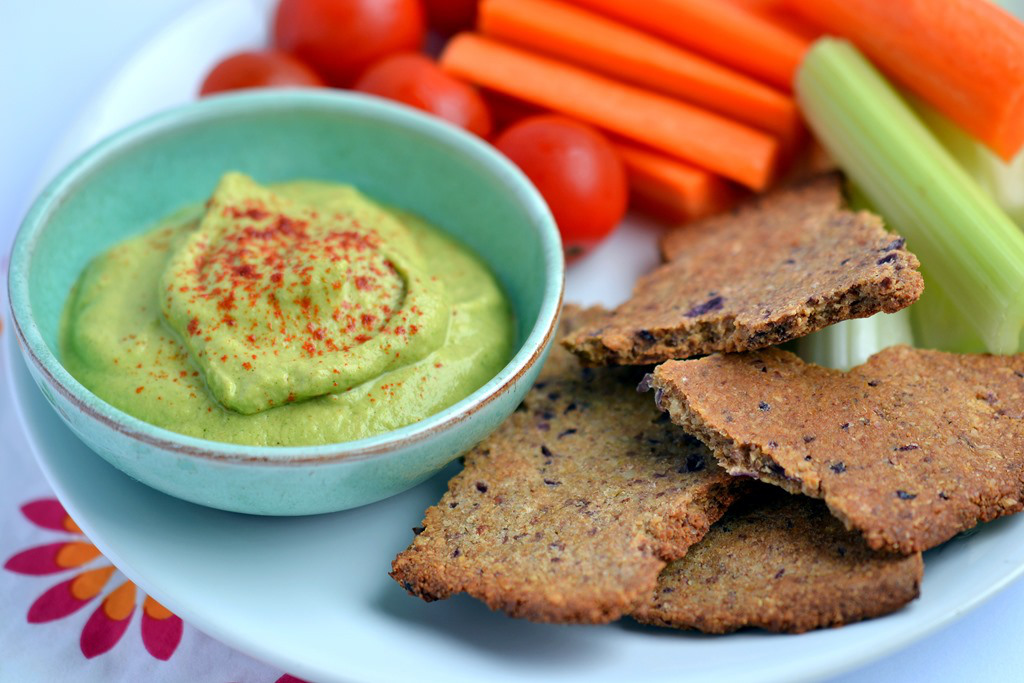
Zucchini Hummus

I like to cover a range of sections when reviewing a cookbook so thought I’d make something savoury to complement my sweet choices. A batch of some kind of dip in the fridge is always useful and there are several in the book to choose from. I opted for the Zucchini Hummus which is rich and satisfying, despite not having chickpeas in. It’s also a good alternative for those who have trouble digesting beans.

Almond-Flax Crackers

Along with the hummus I served some veggies and another one from the book, the Almond-Flax Crackers. These are so so scrumptious and put conventional cardboard-like crackers to shame. They’re completely grain-free so very nutrient-dense and with lots of flavour so I’d happily eat them on their own instead of crisps. I would definitely recommend doubling the batch as there’s no way this recipe serves the 8 specified!

There isn’t one recipe in the book that doesn’t appeal but I’ve somehow shortlisted a few for my “must try very soon” list! The Breakfast Salad, Creole Cauliflower, Sticky Carrot Bites and Baby Gem Lettuce Wraps with Homemade Sweet Chilli Sauce.

I hope you’re as excited about this book as I am and I’m thrilled to have one copy to GIVEAWAY to a very lucky reader. To enter, do any one or all of the following things and leave a comment for each letting me know that you have done so. The more you do the more chances to win you have! I am sending the book personally so this giveaway is open WORLDWIDE!

1. Leave a comment on this post
2. “Like” Coconut and Berries on Facebook
3. Subscribe to Coconut and Berries by email
4. “Follow” me on Twitter
5. “Follow” @FoodstoLove on Twitter
6. “Follow” @RylandPeters on Twitter
7. Tweet about the giveaway and post the url in the comments.

Giveaway ends Thursday 4th December 12am GMT. Winner will be picked randomly and contacted by email within 48 hours of the closing time.

“Super Healthy Snacks and Treats” is available from Amazon.com and Amazon.uk as well as through Jenna’s site “Foods to Love”

Disclaimer: I was provided with a complimentary copy of this book for review purposes, but, as always, all opinions are my own.

If you’re new to Coconut and Berries, Please sign up for email updates and join me elsewhere: I’m on FacebookPinterest, Instagram (@coconutandberries), Google + and Twitter!

P.S. Happy Thanksgiving to my American friends for tomorrow!
R is for…

Red Lentils!

I hope everyone’s still enjoying the A-Z series. We’re coming to the end of Vegan MoFo now. Sob Sad smile but you’ve probably realized that I’m not going to get to the end of the alphabet by Sunday…I’ve been posting every weekday which will only take me to T by Friday. I’m having a lot of fun with it though, so, if you don’t mind, I’m going to keep going through to Z (though I might skip X unless anyone has any ideas for me!). I’ll try and post over the weekend and wrap up by the middle of next week but that might not be possible.

Back to the topic of the day…red lentils!

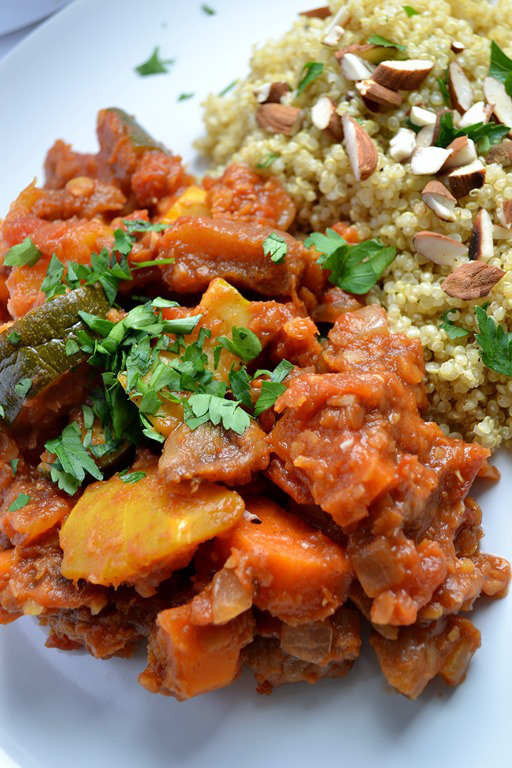
Red Lentil & Root Vegetable Tagine

Red lentils are a little different to their green, brown and black friends in that they don’t hold their shape at all when cooked. This lends them well to curries, stews, soups and similar dishes where they work to thicken up and add body to whatever it may be. The only red lentil recipe I’ve got up on the blog so far is my Sweet Potato, Spinach & Coconut Dahl but I’m sure that will soon change with the arrival of the colder weather when I start to crave those comforting dishes mentioned.

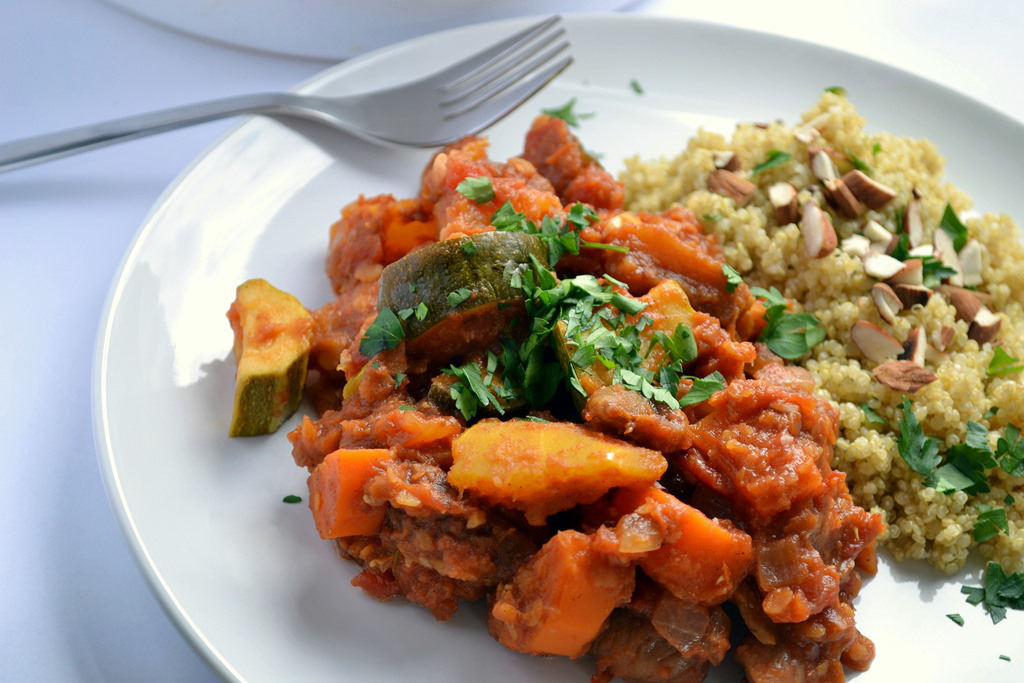
I’ve been sitting on this recipe for far too long and it’s something I’ve made numerous variations of over time. A flavourful, fragrant Moroccan tagine with root vegetables and red lentils.

Red Lentil & Root Vegetable Tagine

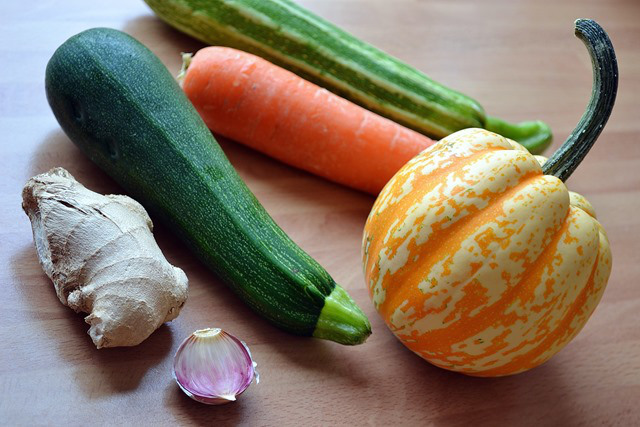
I mix up the vegetables every time I make it, this time I was delighted to be able to use both the squash and courgettes from my garden. I recommend a combination of hard, root veg and something green like courgettes or green beans. But it really is up to you.

It’s just occurred to me that this is another sweet and savoury dish, like yesterday’s recipe, so I hope there aren’t too many haters out there!

Tagine has to have fruit in it though. The sweet dried fruits are lovely with the spices and make this dish that bit more special. Just like the vegetables, you can also use whatever dried fruits you have to hand. This time I used a combination of dried apricots and dried figs but have used both prunes and golden raisins in the past with good results.

Red Lentil & Root Vegetable Tagine

Red Lentil & Root Vegetable Tagine:

Get creative with this dish and use whatever vegetables and dried fruits sound good to you.

1/2T Oil
1 Medium onion, diced
1 Large clove of garlic, minced
1” pc ginger, minced
1/2T Cinnamon
1t Cumin
1t Ground coriander
1-2t Harissa (optional if you like a bit of heat- or try 1/2t Chili Flakes)
1/2t Salt
1/3C Red lentils
1 1/2C Vegetable broth
1 x 400g/14oz Can of chopped tomatoes
1 1/2C Cubed squash (I prefer large chunks)
1 Large carrot, chopped into large chunks
2 Medium courgettes, chopped into large chunks
1/2C Dried fruit (I used a mixture of unsulphured dried apricots and dried figs)
1T Lemon juice
Chopped fresh parsley to serve

This needs to simmer for approximately one hour. You can either do this on the stovetop or in the oven.

If using the latter method, preheat the oven to 180C and place a large casserole dish/tagine in the oven to warm up.

In a large pan, warm the oil over medium heat and add the onion. Cook for a few minutes until softened and add the garlic, ginger, spices and salt. Cook for a further minute for spices to toast. Add lentils, broth and tomatoes and bring to a simmer. Add hard vegetables like squash and carrots and stir to coat in sauce.

Transfer mixture to the warmed dish from the oven if using this method and add the dried fruit to the mix. Cover and return to the oven. Check on it every now and again and give it a stir to prevent sticking.
After about 45 minutes add softer vegetables like courgettes or green beans and return to oven again to finish cooking. Mine usually takes around 1 hour total. You want your vegetables to be cooked through and fairly soft, but not collapsing.

Remove from the oven and stir through lemon juice.

I served this with quinoa (of course!) topped with toasted, chopped almonds and plenty of parsley.

Serves 4

PRINT RECIPE HERE

Red Lentil & Root Vegetable Tagine

I didn’t do a link-love yesterday so you get extra today.

Red lentil recipes I like the look of:

Curry Cashew Red Lentil Burgers

Creamy Red Pepper Lentil Lasagna

Spiced Red Lentil Pancakes

Red Lentil, Lemon & Rosemary Orecchiette

Mellow Lentil “Sniffle” Soup

Enough to keep you busy there?

Let me know your thoughts on the A-Z. If you’re getting bored of it please say so!

Print

G is for…

Green Curry Paste!

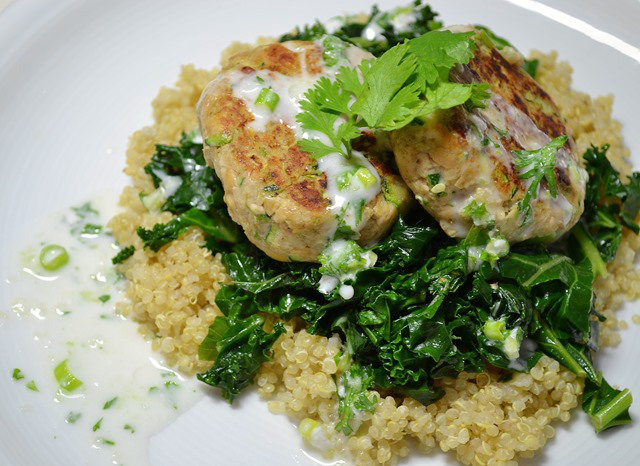
Thai Green Curry Tempeh Cakes

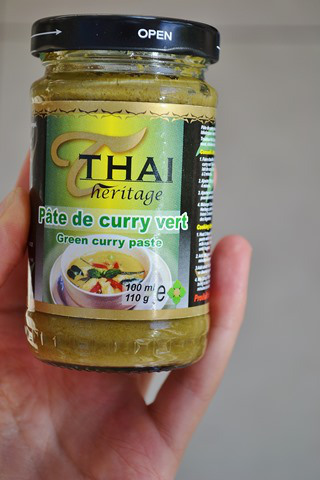
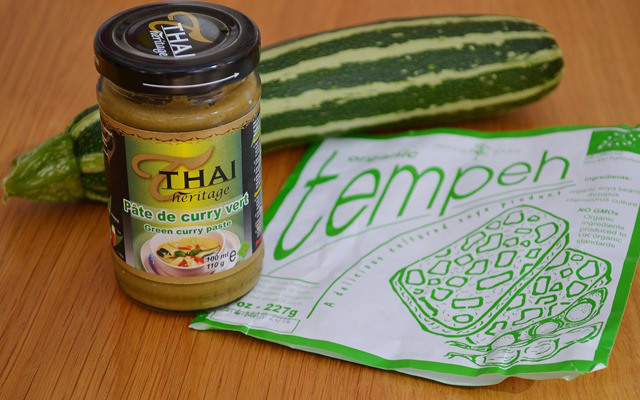
I ummed and ahed over what to choose for “G”. A rummage in my pantry had me pull out garam masala, ginger, green tea and goldenberries before I found this jar of green curry paste. It’s a bit of a giveaway as to how long I’ve had it that the label is in French. I lived in Paris from January to July 2012 so over a year has gone by since I bought this, and it was unopened! Ooops!

It might seem a rather strange thing to bring back with me but often curry pastes contain shellfish so when I stumbled across this one I excitedly snapped it up. It turns out it’s not actually difficult to find vegan curry paste here after all, but, as you can probably tell, I like to be prepared…

Thai Green Curry Tempeh Cakes

I of course could have just made a curry but I was feeling more creative than that and came up with these Thai Green Curry Tempeh Patties instead. They’re pretty easy to make, with just a few ingredients, including the curry paste. Topped with a zingy lime-coconut sauce I had the full curry experience in a different form.

Thai Green Curry Tempeh Cakes

I had half a package of tempeh to use up so just made a small batch of these. You could easily double the ingredients to use a whole package though.

Green Curry Tempeh Patties:

1/2 225g/8oz pkg Tempeh
1/2T Green Curry Paste
1/2C Shredded Courgette (squeeze out water and measure afterwards)
1 Small clove of garlic, minced
2 Green onions, minced (approx 2T)
2T Breadcrumbs (I make breadcrumbs with any leftover bread and freeze them so I always have them to hand, For GF use GF bread)
1/2T Ground flax seed + 1 1/2T Water
Salt + Pepper to taste

Whisk together ground flax and water and leave to thicken whilst you prepare the other ingredients.

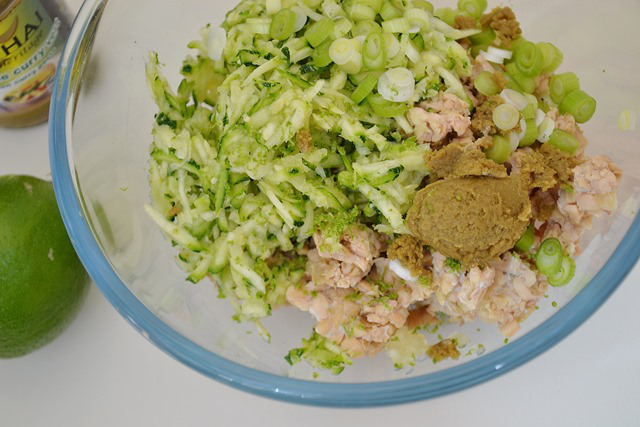
Crumble tempeh into a bowl with your fingers, add shredded courgette, garlic and green onions, Stir in breadcrumbs and flax mixture and mix well, use your hands if you like. You may need another tablespoon of breacrumbs if it’s still very sticky.

Cover the bowl and refrigerate for at least 30 minutes.

Heat a medium-sized pan over medium heat and add a little drizzle of oil. Shape mixture into 4 patties and cook for a few minutes on each side, until lightly browned. (You could probably bake these for a drier texture but I  haven’t tried it)

Serve with the Lime-Coconut Sauce

Serves 2

Thai Green Curry Tempeh Cakes

Coconut-Lime Sauce:

1 Small clove of garlic
1/2 Chili, deseeded and minced
1/8t Salt
1/2C Coconut Milk
3/4T Lime juice
2 Green onions, finely chopped
2T Chopped fresh coriander

Using a pestle and mortar (or the flat of your knife on a chopping board) smash together the garlic, chili and salt. Stir in the coconut milk and lime juice and finally the fresh coriander and green onions.

Thai Green Curry Tempeh Cakes

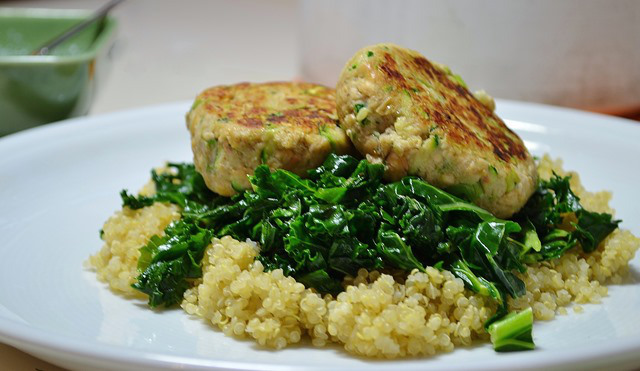
Pre-sauce

I loved these over sautéed kale and quinoa, especially as the greens and grains soak up the tasty sauce.

Now, does anyone have a good Thai green curry recipe?! Or other dishes using green curry paste?

What unopened ingredients do you have in your pantry? It can’t just be me!

Hope everyone’s keeping up with Vegan MoFo now we’re into Week 2 Smile

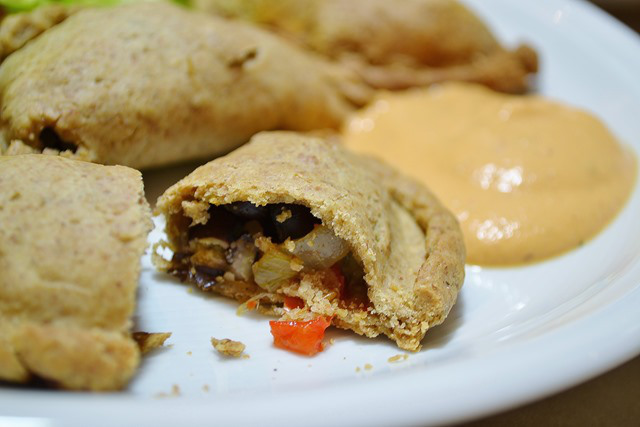
Smoky Black Bean Empanadas with Chipotle Sour Cream

When I was younger and living in London, pre-theatre dinners or family get-togethers would often be a meal at an Argentinian steak restaurant, the Gaucho Grill. Of course, there’s no way I’d go there now (although I think it’s still one of my brother’s favourite places to eat…) , it must be the most un vegan-friendly place going- not just the menu but the décor too- the restaurants are all fitted out in black leather with cow hide furnishings everywhere! The one good thing I take from our visits though is the memory of empanadas.

Smoky Black Bean Empanadas with Chipotle Sour Cream

If you’re unfamiliar with empanadas, they’re popular street food in South America and are essentially flaky pastry pockets filled with a whole variety of fillings, often cheese, meat, and beans. For my vegan version I decided on a smoky, spiced black bean and vegetable filling and served them with a chipotle sour cream for a nice creamy contrast.

I ate a few for dinner alongside a fresh garden salad, but, like my beetroot falafel, they’re also great party food.  Pile up plates with the pastries, serve the sauce in a dish on the side and your guests can eat them with their hands.

Smoky Black Bean Empanadas with Chipotle Sour Cream

This recipe is rather time-consuming but it does make a lot. They are very moreish though so you might end up eating more than you anticipate! You can also freeze them either before or after baking and reheat or cook in the oven from frozen.

Smoky Black Bean Empanadas with Chipotle Sour Cream

Smoky Black Bean Empanadas with Chipotle Sour Cream:

For the Dough:

(Adapted from Viva Vegan! )

3C Flour ( I was using up odds and ends from the pantry so used a mixture of rye, spelt and cornmeal!)
1 1/2t Salt
1/4t Baking soda
7T Coconut oil, chilled
3/4C or more cold water

Non-dairy milk for brushing

Using a food processor pulse flour salt and baking soda together. Add solid coconut oil to the food processor and pulse again until the mixture resembles fine breadcrumbs. Remove mixture to a large bowl and stream in cold water while mixing with fingers. Add just enough water until dough comes together but is not sticky. Knead a few times, divide into 4 balls,  flatten each into a thick disc, wrap tightly in cling film and chill in the fridge for a minimum of 4 hours.

For the Filling:

1T Olive oil
1 Onion, diced small
2 Cloves of garlic, minced
1 Red pepper, diced small
1 Medium courgette, diced small
1 1/2C (1 Can) Black beans
1/2t Salt
1/2t Cumin
1/2t Mild chili powder
1/2t Smoked paprika
1/4-1/2t Liquid smoke (If unavailable use a bit more smoked paprika)

Warm the olive oil in a large skillet over medium heat. Add onion and cook, stirring, for a couple of minutes. Add garlic, red pepper and courgette and continue to cook until soft, approx 5-8 minutes. Add black beans, salt and spices and stir to coat everything well. Turn off heat and set aside until you’re ready to fill your empanadas.

Note: Feel free to mix up the filling ingredients. I think corn would be a nice addition, crumbled tempeh, or maybe plantain?

Chipotle Sour Cream:

1/2C Cashews, soaked
1/4C + 2T Water
1T Chipotle chili in adobe sauce (I puree the cans and store in the freezer and break off a piece when needed)
1 Clove of garlic
1t Apple cider vinegar
1/4-1/2t Salt
Squeeze of lime juice

Blend everything together (a short-cup/personal blender is ideal for small amounts like this). Taste for salt.

Putting it together:

Preheat oven to 190C/375F

Remove dough from fridge and roll out a disc of dough between two sheets of parchment paper into a circle about 1/8” thick. Using a bowl as a guide, cut out circles of approx 4-5” diameter (you can make them bigger if you prefer but that’s the size I went for). Cover and keep cool while you repeat with the next dough disc. Gather up all the remaining dough scraps, re-roll only one more time and cut out as many circles as possible.

Place approx 1 1/2T filling in the middle of each circle, dampen edge with a wet finger and fold one side over the filling. Roll, braid or crimp edge to seal (It took me a while to get the hang of this but I found simply rolling the edge in was the easiest). Place on a lined baking sheet and brush lightly with non-dairy milk. Repeat process until all empanadas are filled- I had a little filling left.

Bake for 30-35 minutes, turning baking sheet half-way through cooking process to ensure even browning. Let cool for a couple of minutes and serve warm with chipotle sour cream.

I’m submitting this recipe to the weekly blog link-ups Wellness Weekends,  Healthy Vegan Fridays and Meatless Mondays

Smoky Black Bean Empanadas with Chipotle Sour Cream

Britain doesn’t have much of a tradition of street-food, although, in London especially, street food from other countries is getting really popular.

Where you live do you have street-food stalls available to you?

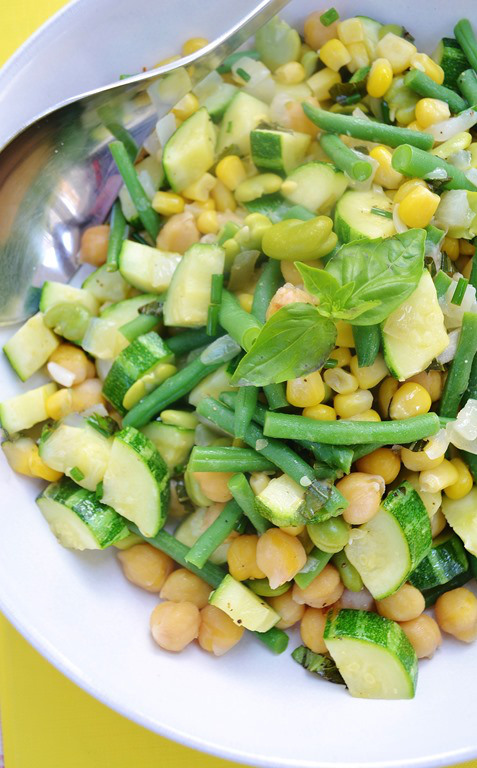
Summer Vegetable + Chickpea Sauté

Yesterday felt like a long day. After a gentle morning baking and pottering in the garden I cycled up to my Granny’s new house to help with her moving in. Lugging around furniture, unpacking boxes and organizing is tiring work! I suppose it’s good practice for my own move in a few weeks’ time though!

After cycling home on a flat tyre, doubling the time my ride should have taken me, the last thing I felt like doing was cooking dinner. The lure of putting my feet up with a large mug of peppermint tea, some dark chocolate, and calling it a day, was pretty strong, but knowing that my Mum would be anticipating a meal on her return dragged me to the kitchen…

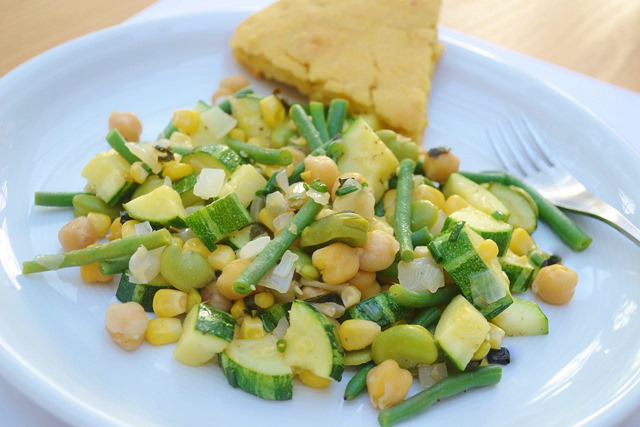
Summer Vegetable + Chickpea Sauté

This quick recipe really shows how tasty a meal can be relying on fresh vegetables, herbs and simple seasoning, and in my opinion it certainly qualifies for my favourite food description: “Delicious and nutritious”! I was glad I made a little effort as I definitely felt better for eating a good, healthy meal…I still had my chocolate though Smile

As I hadn’t planned in advance I used canned chickpeas but I do usually prefer to cook them myself as it’s so much cheaper and I think they have a better flavour. Keeping a couple of cans on on hand is very convenient for times like this though.

This simple sauté came together in about 20 minutes, including the time it took for me to pop out and pick a courgette and some herbs from the garden- pretty speedy if I do say so myself.

Summer Vegetable + Chickpea Sauté

Summer Vegetable + Chickpea Sauté:

If you have it definitely use coconut oil for this dish. It adds a delicious buttery flavour and lends a little bit of richness here.

1/2C Green beans, cut into 2” lengths
1/2C Podded broad beans OR edamame
1/2-1T Coconut Oil
1/2 Onion, diced
1 Medium courgette, diced (1C)
1/2C Corn
3/4C (1/2 Can) Cooked chickpeas
1/2T Lemon juice
1T Chives
2T Basil, julienned
Salt + Pepper

First steam your green beans and broad beans or edamame for 3 minutes. Pinch of skins from broad beans and set aside.

Meanwhile, warm coconut oil in a pan over medium heat and add onions. Cook for a few minutes until clear. Toss in diced courgette and cook, stirring every now and again, for about 5 minutes more. Toss in corn, chickpeas and steamed green vegetables, and continue to cook until all heated through. Season well with salt and pepper, turn off heat and stir in fresh herbs and lemon juice.

Serves 2

I pulled out a couple of pieces of leftover cornbread from the freezer for us to eat alongside this. Love freezer finds!

I’m submitting this recipe to the blog parties: Healthy Vegan Fridays and Wellness Weekends

Summer Vegetable + Chickpea Sauté

What are your pantry staples for last-minute meals?

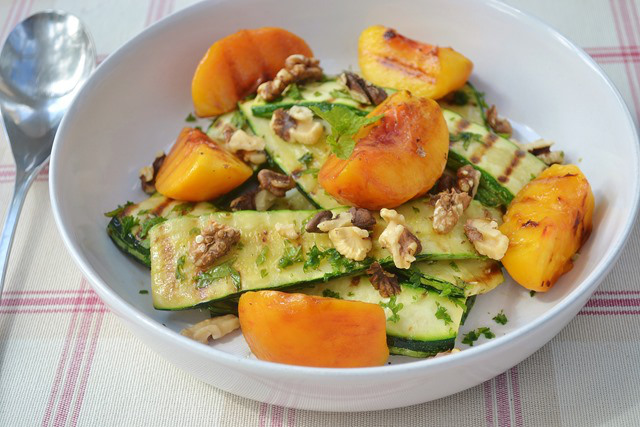
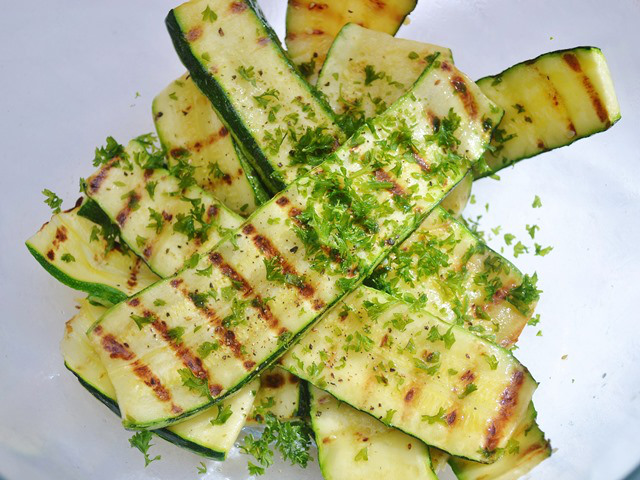
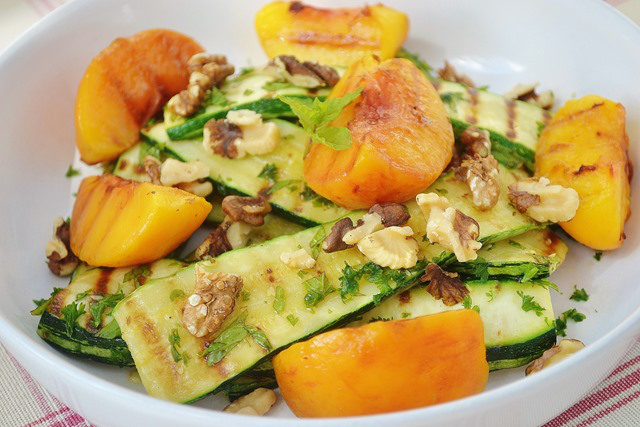
Grilled Peach, Courgette + Walnut Salad

Grilled Peach, Courgette + Walnut Salad

Last week in Edinburgh was probably the first time in weeks that I’d eaten an apple. During the summer I try to eat as much seasonal produce as I can and since it will be back to apples before long there’s no room for them in my diet right now!

Peaches are one of my favourite summer fruits and I tend to enjoy them on their own, best eaten standing over the kitchen sink with juice running down your chin, but I have started trying them in different ways more recently.

I loved the nectarine/peach salad with blackberry dressing, basil, and hazelnuts I made last month and decided on another salad this time.

Grilled Peach, Courgette + Walnut Salad

I’m still struggling to keep on top of the supply of courgettes from the garden. Although initially I was cross when I discovered the muntjac deer were sneakily munching our vegetables during the night, I ended up grateful for some help in eating them!

As well as being very tasty, this grilled salad used 3 courgettes, a nice bonus, for me at least.

It would make a lovely side dish or starter salad, or enjoy it for lunch just as is. Grilling the fruit and vegetables brings out their natural sweetness and some fresh herbs and nuts finish it off nicely. I loved walnuts in this and don’t use them enough, but if you’d prefer another kind just swap them in.

Grilled Peach, Courgette + Walnut Salad

Grilled Peach, Courgette + Walnut Salad :

3 Medium-sized courgettes
2 Peaches
1T Olive oil
2T Chopped parsley
2T Chopped mint
Salt + pepper
3T Toasted walnuts, roughly chopped
1/2T Red wine vinegar
1/2 T Extra-virgin olive oil (optional)

Slice courgettes into thin slices vertically using a sharp knife, discarding the very outside slices.

Peel, remove stone, and quarter peaches.  Preheat a stove-top grill pan (or use an outdoor grill) and brush courgette slices and peaches with the olive oil. In batches grill the courgettes for approx 3-4 minutes on both sides. Try not to move them while they cook so they get nice dark grill marks. Set aside in a bowl while you grill the peach quarters.These are obviously more delicate and only need about 2 minutes on each side.

Season courgettes well and toss with red wine vinegar and fresh herbs. Transfer to a serving dish, place grilled peach quarters on the top, sprinkle with walnuts and drizzle with extra olive oil if using.

Serves 2 for a starter/lunch salad or 4 for a side dish.

I grilled an extra peach while I was at it and it was fantastic with non-dairy yogurt and a little drizzle of maple syrup for dessert.


If you’re growing vegetables this year or get a veg box/csa delivery are you being overwhelmed by an abundance of any in particular?

10-Minute Raw Peanut Noodles

I’ve been a raw food fan for a while now. I love the taste of fresh fruit and vegetables, nuts + seeds in their natural state and especially love how a raw meal makes me feel- nourished and energized! I’ve done a week eating all raw before and even celebrated my 21st birthday at Saf, a fantastic raw restaurant in London.

Despite how much it now, when I first came across raw cuisine I was a little intimidated by all the gourmet recipes I came across that took days to prepare and lots of expensive superfoods I’d never heard of before. But I soon came to realize that raw food doesn’t have to be time-consuming or complicated to taste good, and in fact sometimes the simplest dishes are the best. I’ve got a few raw recipes on the blog so far, a couple of salads, a smoothie and desserts and wanted to post a super quick everyday recipe that I make variations on frequently.

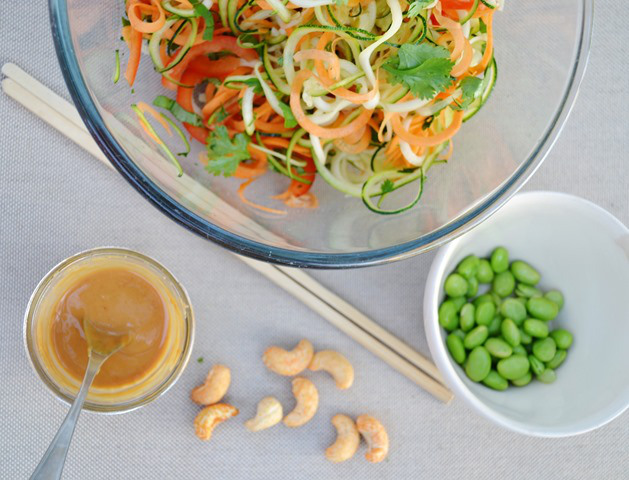
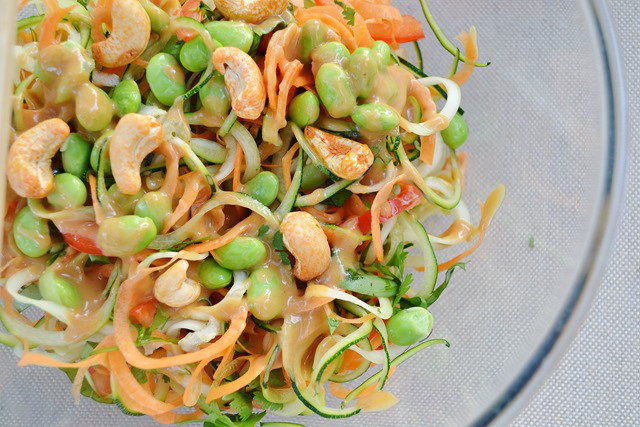
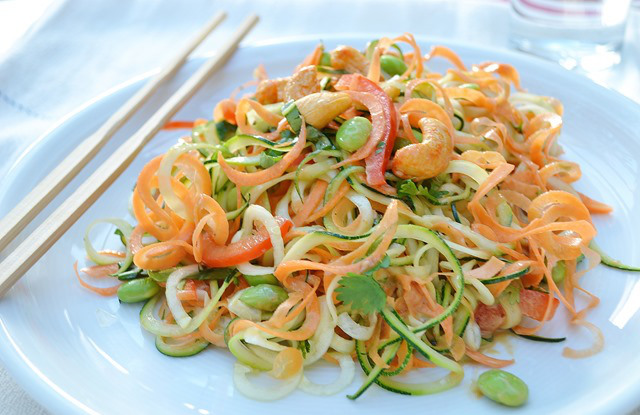
I have a spiralizer (the Benriner, pictured) that I use to make raw veggie noodles, but a julienne peeler works just as well, or you can even make thick “pappardelle” type noodles with a regular vegetable peeler. Courgette noodles are the classic but I wanted an extra colourful dish this time so I made carrot noodles too and added thinly sliced red pepper and lots of fresh herbs.  Edamame and cashews turned this into a more substantial meal, and finally I coated everything with a slightly spicy peanut sauce, so good I couldn’t resist licking my plate after finishing!

10-minute Raw Peanut Noodles

10-Minute Raw Peanut Noodles:

1 Medium courgette, spiralized
2 Small carrots, spiralized
1/2 Red pepper, sliced thinly
1/3 C Edamame, cooked and cooled
2T Fresh basil, julienned
2T Fresh coriander, roughly chopped
2T Toasted Cashews (I actually used some Tamari-roasted Cashews from Clearspring that I had on hand)

For the Spicy Peanut Sauce:

1T Peanut butter
1T Lime juice
1/2T Agave
1/2t Toasted sesame oil
1 Small clove garlic, minced (optional)
1/2t Tamari
A little water to thin (to make as runny as you like it- though bear in mind the vegetables will release water when coated in the sauce so don’t make it too thin!)

Note: Most store-bought peanut butter uses roasted not raw peanuts, so if you’re concerned about the “raw” status of this dish try almond butter instead. The edamame are also cooked so omit for raw and add more nuts instead.

10-minute Raw Peanut Noodles

Prepare dressing first: Simply stir stir all ingredients in a jar or bowl together until completely smooth and add a little water, a teaspoon at a time, if necessary (depending on consistency of your peanut butter), until it reaches your desired consistency. Set aside.

Spiralize your vegetables and chop your herbs. Mix all the ingredients, except the sauce, in a large bowl, you might want to cut some of the noodles if they’re particularly long to make them a little easier to eat (!). Finally drizzle over your sauce and toss to coat everything.

Serves 1

I’m submitting this recipe to the weekly blog hop Raw Foods Thursdays

10-minute Raw Peanut Noodles

Are you a raw food fan? What are your favourite simple and speedy raw recipes?

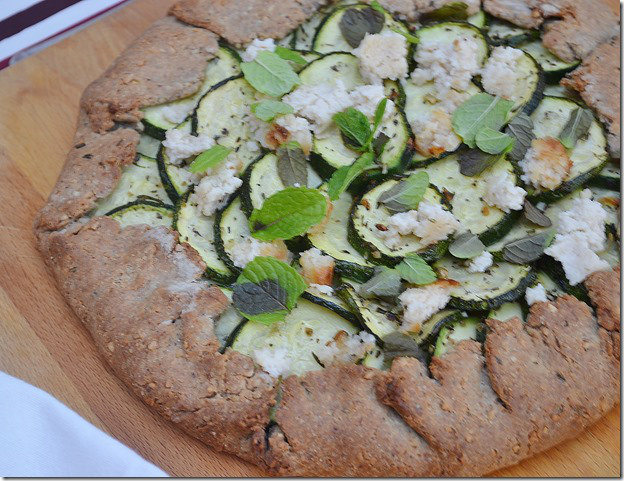
Herby Courgette Galette with Cashew “Chèvre”

Readers are probably aware that the vegetable known in many countries as “zucchini”, here in the UK we call “courgette” . Besides being a Brit I had to keep the British (originally French) word for this recipe for the nice little ring to my recipe title!

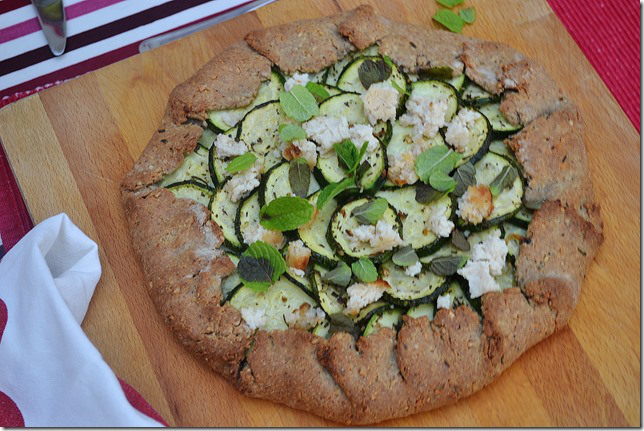
Herby Courgette Galette with Cashew Goat's Cheese

It began with a bag of chestnut flour, a kind gift from an Italian friend who I cook with occasionally. He taught me to make castagnaccio, the traditional Tuscan (naturally vegan) cake made with chestnut flour, olive oil, rosemary, sultanas + walnuts or pine nuts. I love the stuff but I make my castagnaccio small and thin so my bag of flour has hardly been dented.

Looking for more chestnut flour recipes I stumbled across one which I’ve veganized here. The chestnut flour does have a wonderful taste, sweet and rich, but as it’s combined with other flours and ground toasted hazelnuts you could certainly sub another- I’d still recommend something equally flavourful, maybe spelt or buckwheat, or the original recipe suggests millet flour as another option.

The nutty crust encloses layers of sweet caramelized onions, tangy goat’s cheese and herby courgettes and there are even minced fresh herbs in the dough.

In place of the goat’s cheese I decided upon a cashew-based cheese. This recipe at C’est la Vegan had rave reviews and I’d made it before but unbaked, this time I went the whole hog and baked it so it would crumble nicely over the tart and in-between the layers.

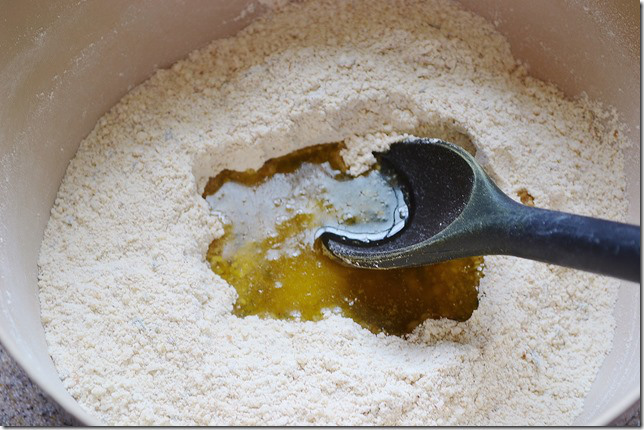
Galette Dough- Olive Oil, Chestnut Flour, Hazelnut Meal

Mixing up my dough

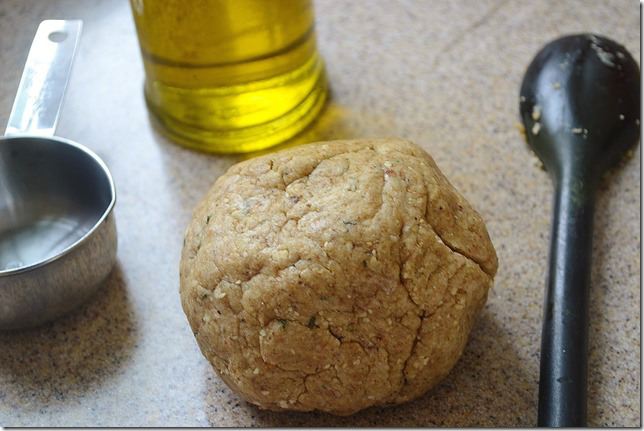
Galette Dough Ball

Ready to go in the fridge for a little resting time

Sliced Courgettes and Fresh Mint

Sliced courgettes and fresh garden mint

Herby Courgette Galette with Cashew Chèvre:

Adapted from Frenchie and the Yankie

Crust

1/2C Whole hazelnuts (to give 3/4C ground)
1/2C Chestnut flour
1/2C Wheat flour
3/4 C Whole wheat flour
1/2t Salt
3 Sprigs Rosemary
1/2C Water
1/4C Olive oil

Lay hazelnuts on a baking tray and toast at 180C/350F for approx 10mins (careful they don’t burn!). Wrap in a kitchen towel and rub vigorously together to remove most of their skins.

Leave to cool while you measure out the other dry ingredients into a large bowl. Pulse the nuts in a food processor with the rosemary until coarsely ground (you still want a little texture).

Add ground nuts to the bowl with the other dry ingredients and mix well. Make a well in the middle, pour in oil and gradually add water bit by bit until you can form the mixture into a ball. You might not need all of the water.

Wrap up the ball of dough and refrigerate for at least an hour. N.b. Remove from fridge to come to room temperature 30 mins before rolling it.

Caramelized Onion:

1T Olive oil
1 Large onion, very thinly sliced
1t sugar
Good pinch of salt

Heat oil over medium-low heat in a large frying pan and add onions. Cook gently for approx 5 minutes until beginning to soften, then sprinkle over sugar and salt. Spread into a thin layer and continue to cook on low for a further 20 minutes, stirring frequently. The onions should be nice and caramelized and again may need more or less cooking time depending on your stove/pan etc.

Set aside in a bowl.

Herby Courgettes

2 Medium courgettes, thinly sliced (1/2 cm)
2 Cloves garlic, minced
1t Dried oregano (or 1T fresh if you can get it)
1T Finely chopped rosemary

Using onion pan cook garlic and herbs for a couple of minutes over medium heat.

Toss in courgettes and spread in a single layer. Cook for a few minutes before flipping and cooking on the other side. Remove from heat when beginning to soften but still crisp.

Set aside.

Putting Galette together

You will need your dough, caramelized onions, courgettes, 1/2 Recipe Cashew Chèvre ( I made the whole recipe and had some leftover, but use as much as you like), fresh mint.

Roll out dough to a circle approx 30cm in diameter on a large piece of parchment paper. Don’t worry if the edges are a little rough, it’s supposed to be rustic-looking!

Spread caramelized onions over, leaving a border of 1-2 inches. Next crumble over half your chèvre. Finally, arrange courgette slices working in overlapping circles, covering onions and chèvre. Fold edges over courgette, crimping as you go.

Lift up sides of parchment paper and place the whole thing on a large baking tray.

Put it back in the fridge for 15-30 minutes.

Preheat oven to 180C/350F. Cook galette for 30 minutes- edges should be golden and crunchy.

Leave to sit for a few minutes (if you have the patience…), sprinkle over remaining chèvre and mint leaves.

Serves 4-6

Herby Courgette Galette with Cashew Goat's Cheese

This turned out far better than I could have imagined, and although there are a few stages so it does takes some time, it was so worth it. I’m also sort of presuming that if you’re reading you probably like to spend time in the kitchen too!

So, who out there has used chestnut flour before? More ideas very welcome.

Digging into my bag has reminded me I need to get in touch with my Italian friend and organize another cooking session… Maybe I’ll pick up some traditional Italian recipes to share on the blog!