V is for…

Vanilla!

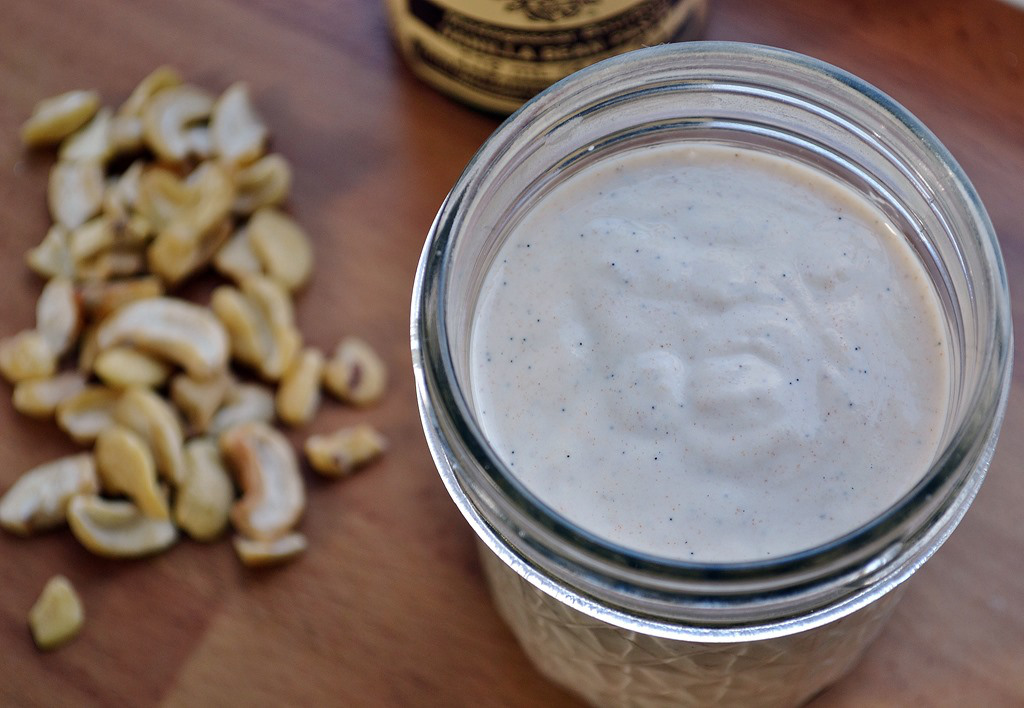
Vanilla Cashew Cream (no added sugar)

As much as I love chocolate in its solid form, when it comes to desserts I’m a vanilla girl. I’d choose vanilla ice cream and vanilla cake over their chocolate counterparts without even pausing to think.

I made a glorious Vanilla Bean Coconut Whipped Cream to top my Raw Banoffee Pie a little while back and was very tempted to make it again but wanted to try something different, as usual.

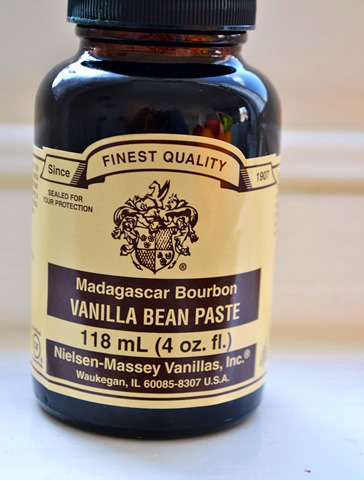
I use cashews a lot to make creamy sauces and had already seen a sweet cashew cream over at Gluten Free SCD and Veggie, so that’s what I went for, adapted slightly to my tastes. I’m now back to student living and trying not to go overboard with spending so I opted for Vanilla Bean Paste instead of whole vanilla beans, a more economic choice and still just as tasty in my opinion. Read more about the difference between vanilla extract, bean and paste here. I also sweetened the cream with a couple of dates but use whatever sweetener you like, agave nectar, maple syrup, stevia or powdered coconut sugar, as I did for my coconut whipped cream.

Vanilla Cashew Cream (no added sugar)

Vanilla Bean Cashew Cream:

(Adapted from Gluten Free SCD and Veggie)

1/2C Cashews
1-2 Soft pitted dates (or 1/2T Agave, Maple or other Sweetener)
1/2C Almond milk
1t Vanilla bean paste OR 1/2 Vanilla bean, seeds scraped out

Soak cashews and dates in separate bowls in water for at least 1 hour. Drain and rinse cashews and drain dates. Blend together all ingredients until completely smooth. I used a Tribest personal blender, you may need to double the ingredients if using a regular-size blender in order to get the cream completely smooth.

Makes approx 1 C

PRINT RECIPE HERE

I don’t think anyone can truthfully say they don’t like vanilla, it’s a lovely flavour and adds an extra hint of something in the background of any sweet treat.

But it is usually that, in the background. How often do you eat vanilla ice cream on its own? Ok, I know someone who does but I’m counting them as an anomaly here…!

So, choosing vanilla for my letter “V” I knew I’d be making 2 things…something vanilla-y and something to go with it.

Caramel Apple Upside Down Cake

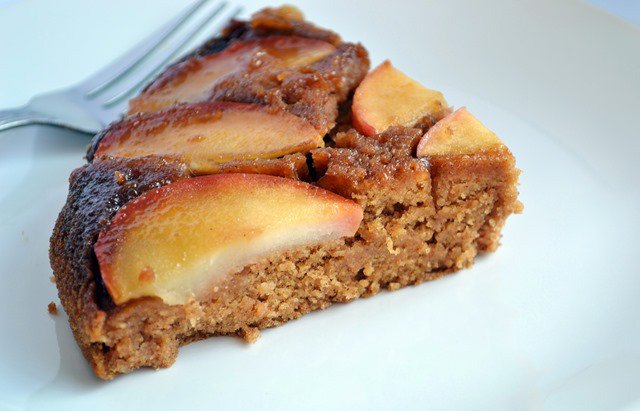
It’s been a little while since I’ve featured something sweet on Coconut and Berries so decided to go all out for today’s recipe with a Caramel Apple Upside Down Cake.

It sounds extremely decadent and certainly tastes it with its soft, fluffy crumb and gooey caramel topping, but I promise it’s still reasonably healthy! I used wholegrain flour and a modest amount of low glycemic coconut sugar instead of refined flour and sugar.

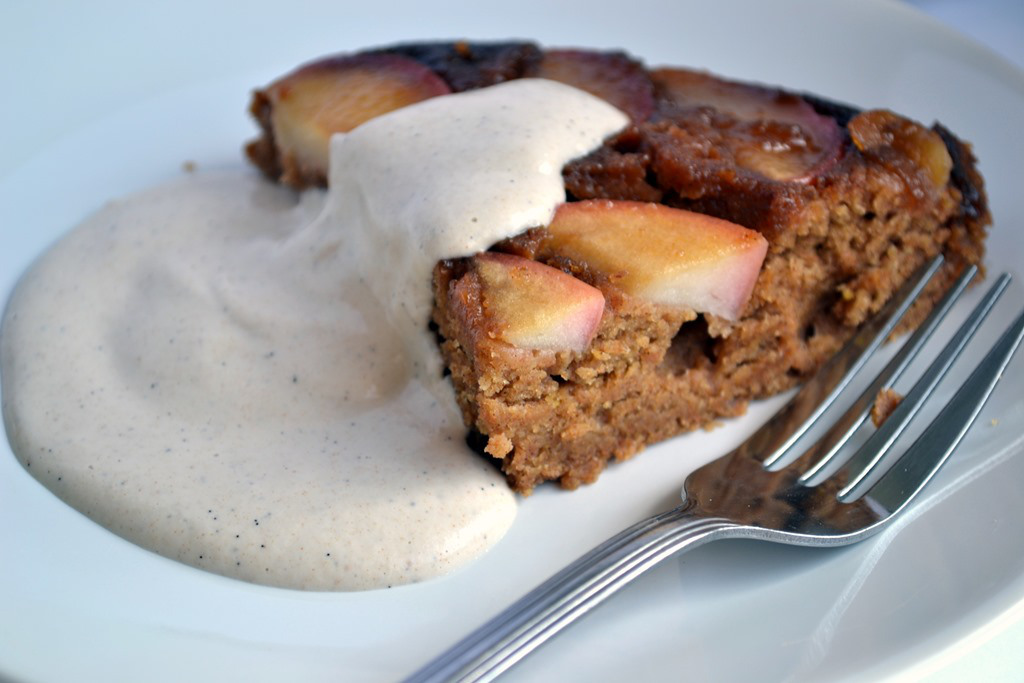
It’s extra delicious served with a generous dollop of the vanilla cashew cream.

Caramel Apple Upside Down Cake

Caramel Apple Upside Down Cake

Notes: This recipe makes a small cake, for a larger one, double the ingredients, use a standard-size cake tin and cook for approx 25 minutes.

1C Light spelt flour
1/2t Baking soda/bicarbonate of soda
1/8t Salt
1t Cinnamon
3T Coconut sugar
1/2C + 1T Non-dairy milk
3T Sunflower oil (or other neutral oil) (For Lower Fat sub 2T apple purée + 1T oil)
1 Medium dessert apple, cut into fairly thin slices
2T Coconut Oil
1 1/2T Coconut Sugar

Preheat oven to 180C/350F.

Sift dry ingredients together in a large bowl. Whisk together sunflower oil and non-dairy milk. Add wet to dry and stir gently to combine.

Lightly oil the sides of a small cake tin (mine was 6 1/2”)

Add 2T Coconut oil to tin and place in oven for a few seconds to melt. Sprinkle coconut sugar over the oil and arrange the apple over the top, as close together as possible in one layer.

Pour the cake batter over the top carefully, ensuring not to disturb the apple slices.

Place in oven and bake for 15 minutes. Let cool for 1 minute then invert onto a plate.

Serve warm with Vanilla Cashew Cream, coconut cream, non-dairy ice cream or custard.

Serves 4-6

PRINT RECIPE HERE

I’m submitting this recipe to the weekly link-party, Wellness Weekends, and the Comfort Foods Potluck Party.

Caramel Apple Upside Down Cake

Here are a couple of tasty-looking recipes where vanilla features prominently:

Raw Vanilla Cheesecake

Vanilla Sesame Shake

FF Vanilla Waffles

Vanilla or Chocolate?

It’s the last day of September tomorrow and the official end of Vegan MoFo, but as mentioned in my last post I’m finishing my A-Z series so will be posting for a few more days before resuming normal blogging. 

Vegan-MoFo-Banner_thumb.jpg

S is for…

Sunflower Seeds!

I chose sunflower seeds for “S” more to push myself than for any other reason. We all fall back on our staple ingredients, and sunflower seeds are not one of mine. Cashews, almonds and more recently,  hemp seeds, are my most used nuts/seeds, tending to overshadow the humble sunflower seed. After this month I hope to take heed of my advice and make the most of the variety in my pantry.

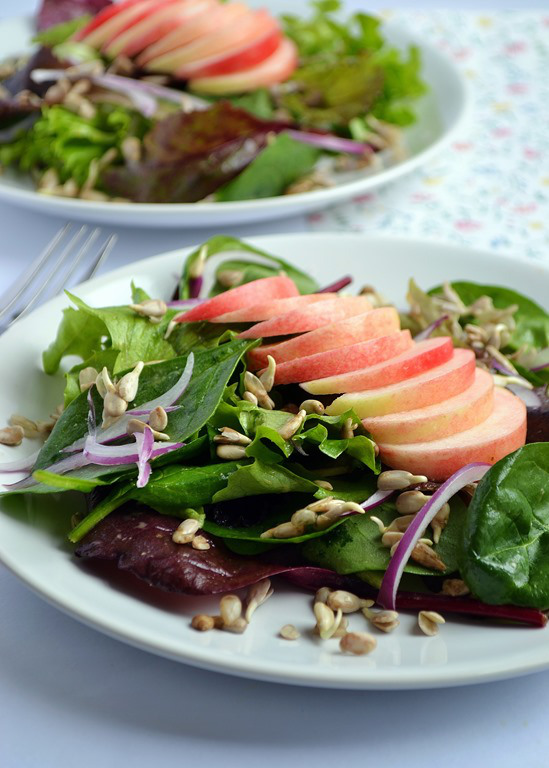
Babyleaf, Apple & Sunflower Seed Salad w/Miso-Lemon Dressing

As well as being just as versatile and nutritious as other nuts and seeds out there, sunflower seeds are one of the cheapest. A particular bonus for someone like me, who likes to think of themselves as rather frugal…!

Over here sunflower seeds are normally seen hulled but I know that in other countries they’re especially popular roasted in their shells, salted, and eaten as a snack.

The way I normally eat them is as a salad-topper for a little crunch and a nutrition boost and came up with a simple side or starter salad for today’s post.

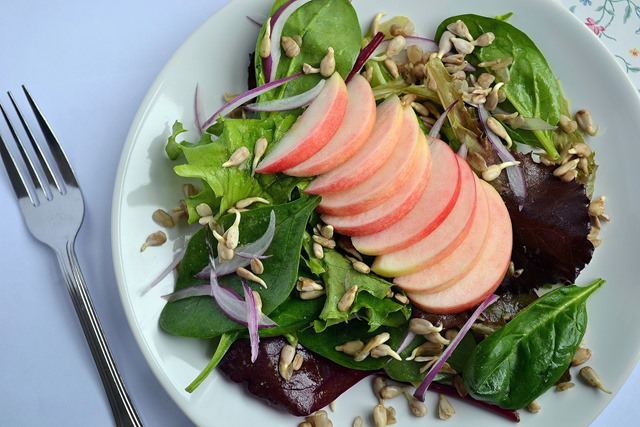
Babyleaf, Apple & Sunflower Seed Salad w/Miso-Lemon Dressing

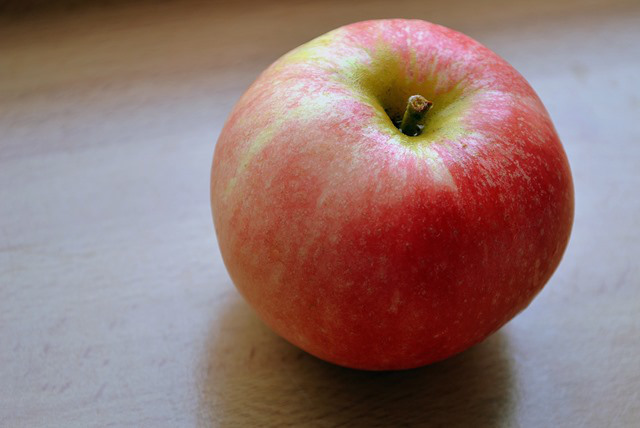
I knew I wanted to include apple in my salad since we were given these gorgeous ones from a neighbour. The same kind neighbour who gave us the plums!

Aren’t they pretty? I love how pink they are, even the flesh has a pinkish hue as if the colour from the skin has somehow seeped into it.

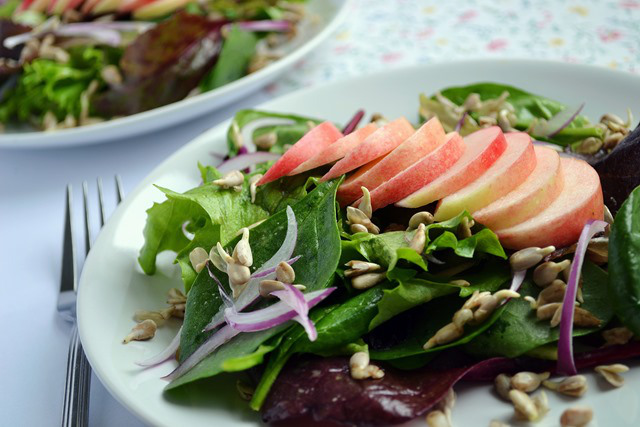
This is really quick to put together so ideal for when you want a salad to go with your main meal but more than just some unadorned greens. I used a mix of baby leaves for the base,  added some very thinly sliced red onion, slivers of apple and a generous handful of sprouted sunflower seeds. I like to sprout seeds and legumes as I like their fresh, crisp taste and it also makes their nutrients more bio-available (see here for more info and a handy guide to sprouting) but toasted, or even just raw seeds would still be tasty.

I dressed the salad with a miso-lemon dressing which was a nice slightly salty, tangy contrast to the sweet apple.

Babyleaf, Apple & Sunflower Seed Salad w/Miso-Lemon Dressing

Babyleaf, Apple + Sunflower Seed Salad with Miso-Lemon Dressing:

2 Generous handfuls of Baby leaves (or mild greens like spinach or pea-shoots)
1 Medium dessert apple, thinly sliced
3T Sunflower seeds (sprouted, toasted or raw)
1/4 Red onion, very thinly sliced

Miso-Lemon Dressing:

1T Lemon juice
1/2T White miso
1/2T Olive oil
1/2t Tamari
Pepper

Whisk together the lemon juice and miso until completely smooth then add the other ingredients and whisk to emulsify.

In a large bowl toss the salad leaves with as much dressing as it needs (add it slowly as you don’t want it to be soggy and you probably won’t want all of it)

Plate the salad: Place a layer of leaves on the plate(s), then scatter over the red onion and seeds. Finally, arrange the apple slices on top.

Serves 1-2

PRINT RECIPE HERE

Babyleaf, Apple & Sunflower Seed Salad w/Miso-Lemon Dressing

As usual, I’m sharing some of the sunflower seed recipes I’ve come across which appeal to me or that I’ve made an enjoyed:

Firstly something sweet from The Kitchn: Sunflower-Date Raw Cookies

This Broccoli Raisin Sunflower Seed Salad is a favourite

Sunflower seeds are soft, so, after a soak, blend up well. They are a nice, cheaper alternative to cashews in vegan, creamy sauces like this Creamy Herb Sunflower Dressing/Dip. This recipe also uses them, along with cashews, to make a sour cream of sorts, then swirled into black bean soup. I’ve made this one and can vouch for its yumminess!

2 more dips/spreads I want to try are: this Super-Simple Gingery Sunflower Seed Paté and this Raw Carrot, Almond and Sunflower Seed Paté

I am loving Vegan MoFo but it’s leaving me no kitchen time at all for trying all the  wonderful creations from other bloggers and my cookbooks. The creativity around the blogosphere this month has been so phenomenal that I’m amassing a rather overwhelming number of recipes too!

Have you picked up any great recipes, tips or info this month?

Print

Q is for…

Quinoa!

Could it really be anything else?! Even if there were other ingredients that began with “Q” I’m almost certain quinoa would have beaten them all.

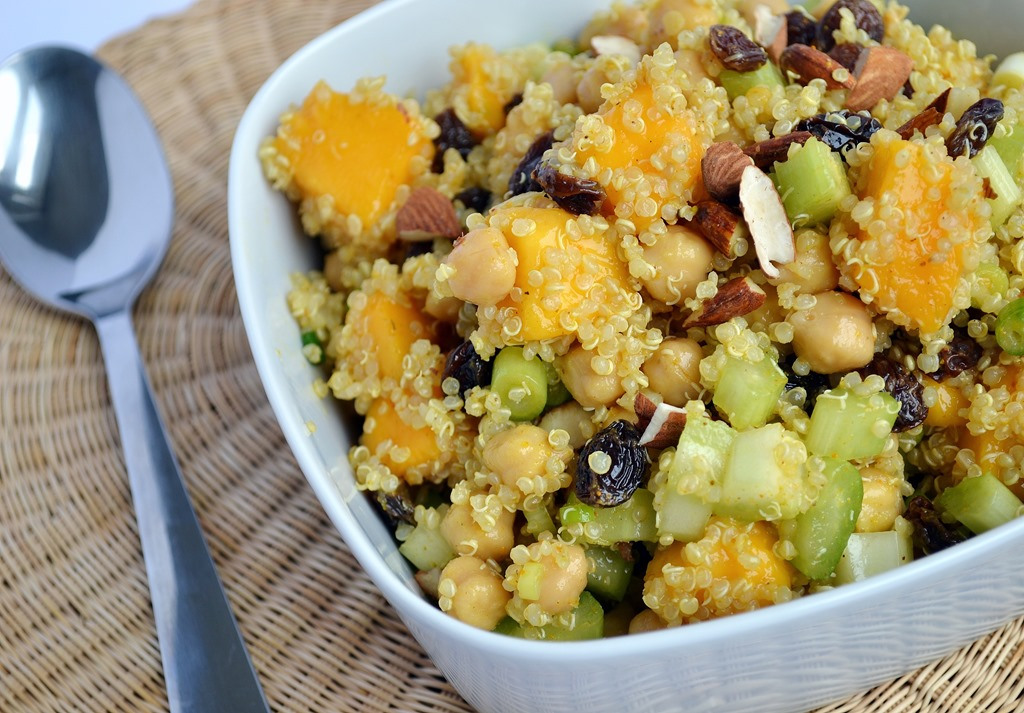
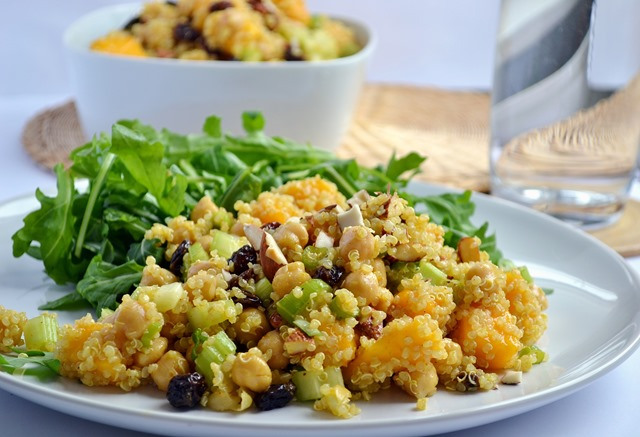
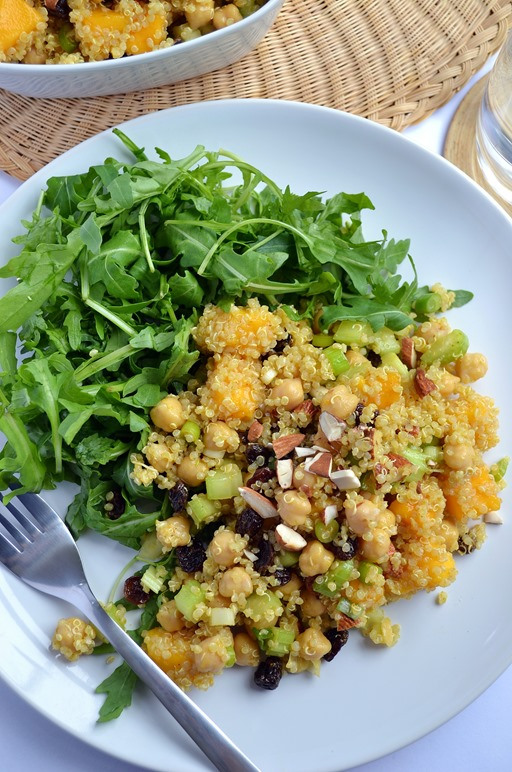
Curried Chickpea, Mango & Quinoa Salad

I’m pretty sure quinoa was something I’d never had before vegan days. It’s amazing how many foods I didn’t even know existed before I went vegan. People have no idea what they’re talking about if they think a vegan diet is limiting!

It’s become a staple in my kitchen and I eat it probably several times a week now.

It cooks and looks like a grain, and I generally treat it a bit like one, even though it’s actually a seed.

I’m happy eating it plain as a side-dish to a saucy curry or stew or the base of an all-in-one bowl meal. It can be ground into a gluten-free flour and used in baked goods. I used it as a binder in my Kidney Bean, Sweet Potato & Quinoa Patties. It’s also delicious cooked in nondairy milk and served as a porridge with your favourite toppings….the list is endless!

Curried Chickpea, Mango & Quinoa Salad

I thought about doing something more unusual today, but in the end fell back on an old favourite- the quinoa salad. I often make a large grain/bean salad and eat it over a few days as they tend to keep well in the fridge. Quinoa seems to absorb the flavours of the other ingredients and dressing you add, making your salad just get better over time.

I’m a big fan of adding fruit to salads but I know a few people aren’t into the sweet/savoury combination so sorry but today’s recipe isn’t for you :(

Starting with a base of quinoa, I added some chopped celery and green onions for crunch, chickpeas for more substance, a generous handful of raisins and large chunks of sweet mango. Coated it all in a mild curry dressing and finally stirred through some toasted almonds.

I was so happy to eat leftovers today!

Curried Chickpea, Mango & Quinoa Salad
Curried Chickpea, Mango & Quinoa Salad:

2C Cooked + cooled quinoa (approx 1/2C dry)
3/4C Chopped celery
1/2C Raisins
4 Green onions, thinly sliced
1 1/2C/1 Can Cooked chickpeas
1 Medium mango, cubed
1/3C Chopped, toasted almonds

Dressing:

2T Lemon juice
1t Maple syrup
1 1/2T Olive oil
1/2t Salt
1 1/2t Mild curry powder
1/2t Ground cumin
Several grinds of black pepper

Curried Chickpea, Mango & Quinoa Salad

Combine all salad ingredients, except for almonds in a large bowl. Whisk together dressing ingredients in a jar. Add dressing to the bowl and toss well. Add almonds just before serving to retain crunch.

This salad is best if made a few hours (or a day) before serving to allow the flavours to mingle.

Serves 4

PRINT RECIPE HERE

I’m submitting this recipe to the weekly blog hops, Wellness Weekends and Healthy Vegan Fridays.

Curried Chickpea, Mango & Quinoa Salad

If I haven’t yet convinced you to add quinoa to your diet or eat it even more than you already are, maybe its amazing nutritional profile will!

What’s typically highlighted is that quinoa contains all essential amino acids, making it a complete protein, unlike any other plant food. It is a particularly concentrated source of calcium as well as having high levels of other minerals such as iron, magnesium, magnesium and copper. It’s rich in fibre and is of course gluten-free, so ideal for those with gluten sensitivities too.

Now tell me…can anyone name another ingredient beginning with “Q”?! As per my self-imposed rules this month, it has to be a pantry ingredient, so no fresh fruits and vegetables allowed.

Print

P is for…

Polenta!

Polenta

I was a little confused about the difference between cornmeal and polenta and the line between the two does seem to be fairly blurred. This is one opinion from the Kitchn. I tend to think of polenta as medium or coarse cornmeal and use it mainly for making cornbread (!) and cornmeal pancakes.

This post from Little Vegan Bear reminded me that it’s great on it’s own too. You can eat it creamy and soft (I like it this way for breakfast as an alternative to porridge) or pour it into a dish, cool it, cut it into shapes and bake or pan-fry until crispy.

Many people seem to think they don’t like polenta but I’m convinced that’s because they haven’t had it cooked well. It is very bland so needs plenty of seasoning to make it taste good.

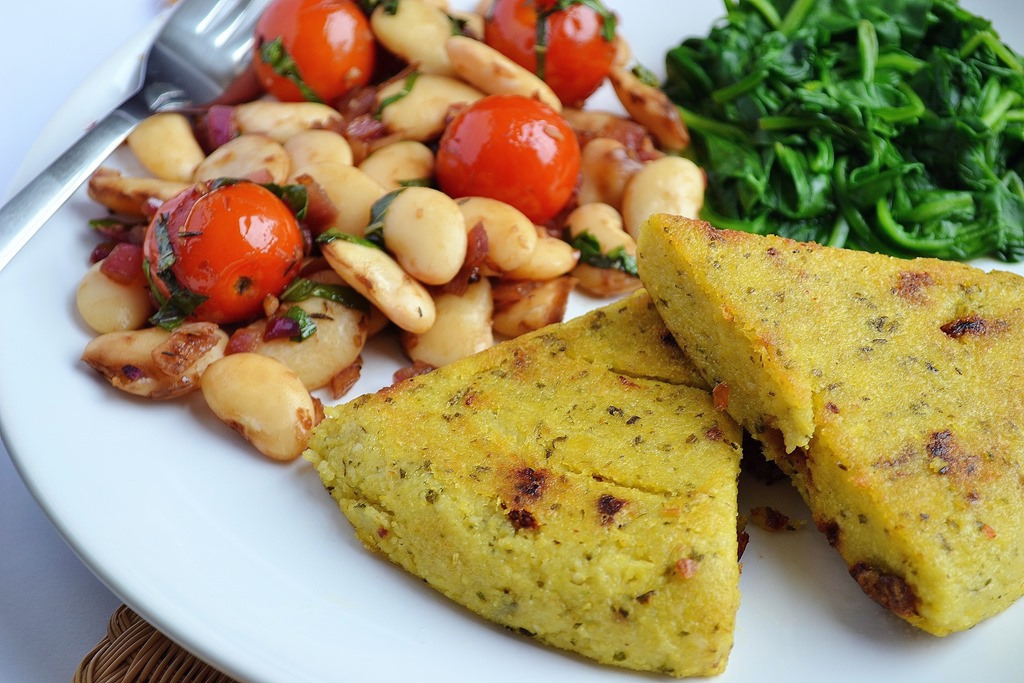
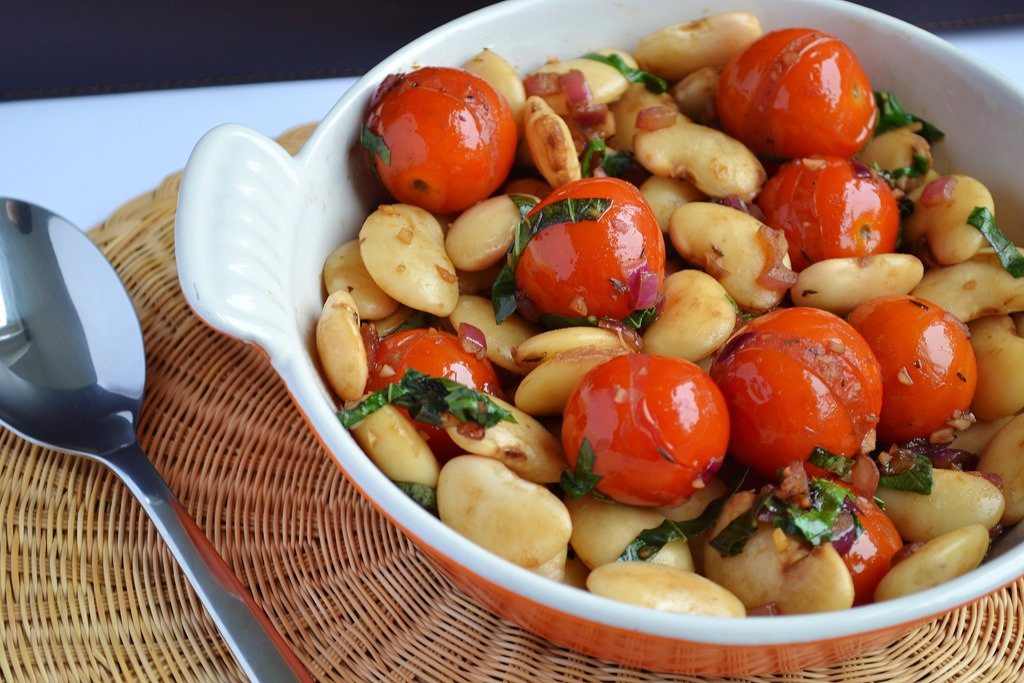
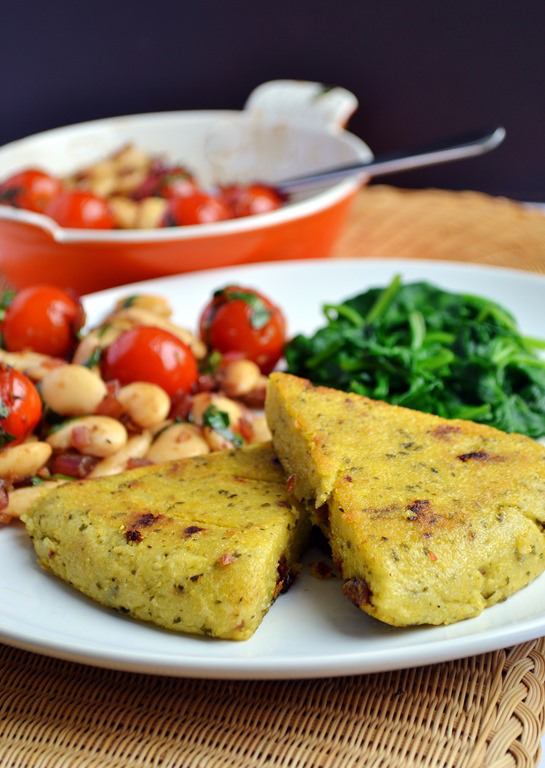
I stirred in some pesto and sundried tomatoes to really amp up the flavour here and served it with some simple balsamic white beans with tomatoes and basil which complemented the dish well.

Pesto Polenta Triangles, Balsamic White Beans with Cherry Tomatoes + Basil

Pesto Polenta Triangles:

2C Water
3/4C Polenta
1/2t Salt
1/4C Non-dairy Milk (unsweetened)
1T Nutritional yeast
1 1/2T Pesto
1/4C Sundried tomatoes (oil-packed or dried + reconstituted in hot water)

Bring the water to a boil in a medium-size pan. Add the polenta and salt and turn the heat down, it might splutter so be careful! It will start to thicken quickly so whisk vigorously to avoid lumps.

If you’re using regular polenta, stir to thicken for 5-10 minutes then add the remaining ingredients. If using instant polenta it will only need about 2 minutes to thicken up.

When all ingredients are incorporated and the mixture is very thick, pour into a lightly oiled container, smooth out top and leave to cool. Refrigerate for at least an hour.

Cut polenta into 6 equal triangles (or shape of your choice). Heat a pan over high and add a drizzle of olive oil. Pan-fry polenta triangles for a approx 3 minutes on both sides until crisp.

Serves 2-3

Pesto Polenta Triangles, Balsamic White Beans with Cherry Tomatoes + Basil

I like to use larger white beans like butter beans here but cannellini would also work well. I love this bean dish. It’s sweet and syrupy from the balsamic and red onion, and the juicy cherry tomatoes, just beginning to collapse, burst in your mouth. Plenty of garlic and basil round everything out.

Balsamic White Beans w/Cherry Tomatoes + Basil:

1/2T Olive oil
1/2 Red onion, diced small
1 Clove of garlic, minced
1/4t Dried thyme (optional)
125g/4oz Cherry tomatoes
1 1/2C/1 Can cooked white beans
2T Balsamic vinegar
Salt + pepper

Heat olive oil in a large pan over medium-high. Cook red onion for a few minutes until soft, add garlic and thyme and sauté for another minute. Add Cherry tomatoes and continue to cook until beginning to collapse. Finally add white beans and balsamic vinegar and cook until warm through and the balsamic has reduced.

Season with salt and pepper and serve

Serves 2-3

PRINT RECIPE HERE

Pesto Polenta Triangles, Balsamic White Beans with Cherry Tomatoes + Basil

A few dishes using polenta that I’ve got my eye on…

This Polenta topping for fruit crumble from David Lebovitz sounds a lovely way to change up my favourite oaty version

This Sweet Potato & Coconut Polenta with Asian Vegetable Fricasée sounds absolutely delicious and is really different to any other polenta dishes I’ve seen.

These South-western Bean & Cornmeal Cakes- You knew I’d feature a patty recipe didn’t you?!

Over to you…

Have you had good experiences with polenta? What do you make with it?

Print

Side Notes: Coconut and Berries now has a print recipe feature! Just click on the link “Print Recipe here” and you’ll be taken to a pdf showing only the recipe without the rest of the post and pictures, for easy printing. Hope it’s helpful for some of you.  

G is for…

Green Curry Paste!

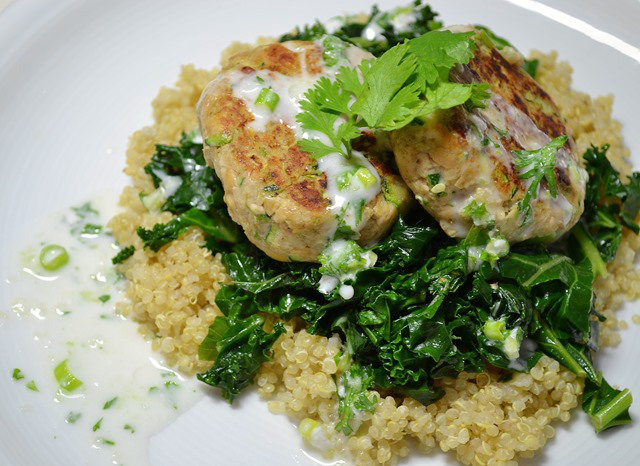
Thai Green Curry Tempeh Cakes

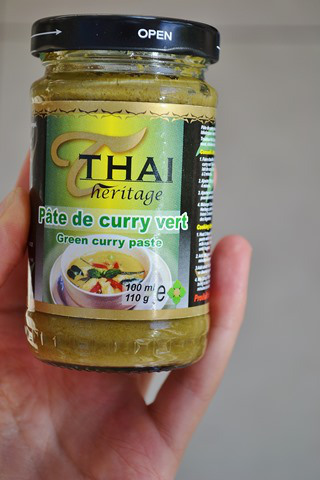
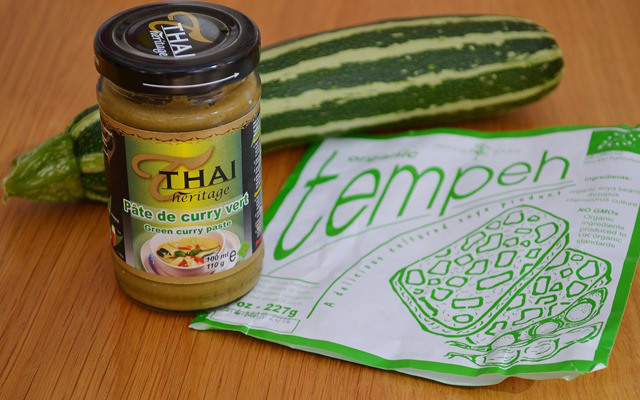
I ummed and ahed over what to choose for “G”. A rummage in my pantry had me pull out garam masala, ginger, green tea and goldenberries before I found this jar of green curry paste. It’s a bit of a giveaway as to how long I’ve had it that the label is in French. I lived in Paris from January to July 2012 so over a year has gone by since I bought this, and it was unopened! Ooops!

It might seem a rather strange thing to bring back with me but often curry pastes contain shellfish so when I stumbled across this one I excitedly snapped it up. It turns out it’s not actually difficult to find vegan curry paste here after all, but, as you can probably tell, I like to be prepared…

Thai Green Curry Tempeh Cakes

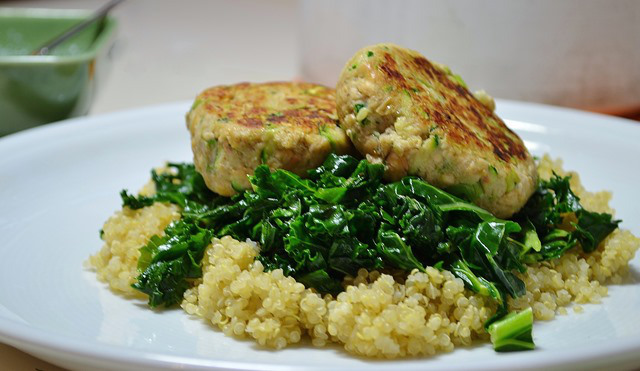
I of course could have just made a curry but I was feeling more creative than that and came up with these Thai Green Curry Tempeh Patties instead. They’re pretty easy to make, with just a few ingredients, including the curry paste. Topped with a zingy lime-coconut sauce I had the full curry experience in a different form.

Thai Green Curry Tempeh Cakes

I had half a package of tempeh to use up so just made a small batch of these. You could easily double the ingredients to use a whole package though.

Green Curry Tempeh Patties:

1/2 225g/8oz pkg Tempeh
1/2T Green Curry Paste
1/2C Shredded Courgette (squeeze out water and measure afterwards)
1 Small clove of garlic, minced
2 Green onions, minced (approx 2T)
2T Breadcrumbs (I make breadcrumbs with any leftover bread and freeze them so I always have them to hand, For GF use GF bread)
1/2T Ground flax seed + 1 1/2T Water
Salt + Pepper to taste

Whisk together ground flax and water and leave to thicken whilst you prepare the other ingredients.

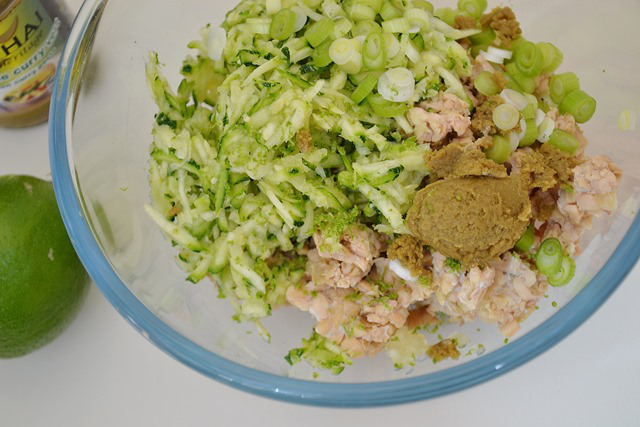
Crumble tempeh into a bowl with your fingers, add shredded courgette, garlic and green onions, Stir in breadcrumbs and flax mixture and mix well, use your hands if you like. You may need another tablespoon of breacrumbs if it’s still very sticky.

Cover the bowl and refrigerate for at least 30 minutes.

Heat a medium-sized pan over medium heat and add a little drizzle of oil. Shape mixture into 4 patties and cook for a few minutes on each side, until lightly browned. (You could probably bake these for a drier texture but I  haven’t tried it)

Serve with the Lime-Coconut Sauce

Serves 2

Thai Green Curry Tempeh Cakes

Coconut-Lime Sauce:

1 Small clove of garlic
1/2 Chili, deseeded and minced
1/8t Salt
1/2C Coconut Milk
3/4T Lime juice
2 Green onions, finely chopped
2T Chopped fresh coriander

Using a pestle and mortar (or the flat of your knife on a chopping board) smash together the garlic, chili and salt. Stir in the coconut milk and lime juice and finally the fresh coriander and green onions.

Thai Green Curry Tempeh Cakes

Pre-sauce

I loved these over sautéed kale and quinoa, especially as the greens and grains soak up the tasty sauce.

Now, does anyone have a good Thai green curry recipe?! Or other dishes using green curry paste?

What unopened ingredients do you have in your pantry? It can’t just be me!

Hope everyone’s keeping up with Vegan MoFo now we’re into Week 2 Smile

E is for…

Edamame!

I know my A-Z series is pantry ingredients not fresh fruit and vegetables, but I decided edamame count as I buy the frozen packaged kind Smile . My blog, my rules!

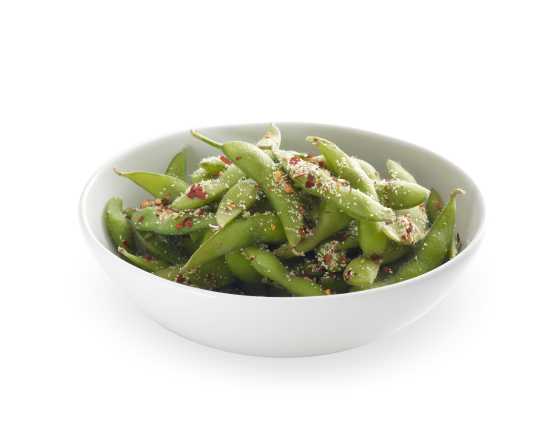
I love edamame but always forget to use them…probably because they’re in my freezer and not as visible as the veg in my fridge’s crisper drawer. But, I had lunch at the Japanese noodle restaurant chain Wagamama a few days ago where one of the sides on offer is simply a bowl of salted, steamed edamame and it reignited my passion for these little green beans.

edamine

I can’t seem to find them still in their pods unfortunately but they’re more convenient for a variety of recipes in their podded form anyway. I’ve used them in a few recipes on the blog so far- My Summer Vegetable + Chickpea Sauté, 10-minute Raw Peanut Noodles, and my favourite Cauliflower Fried “Rice” with Grilled Tofu. I’m still mad about dips so thought I’d make something similar to my Broad Bean + Roasted Garlic Dip but using edamame.

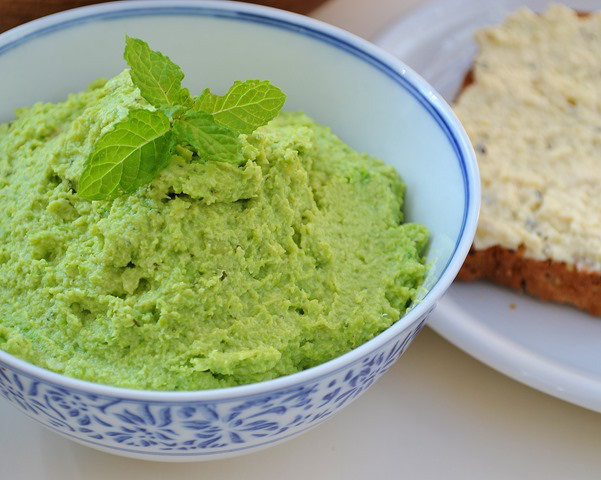
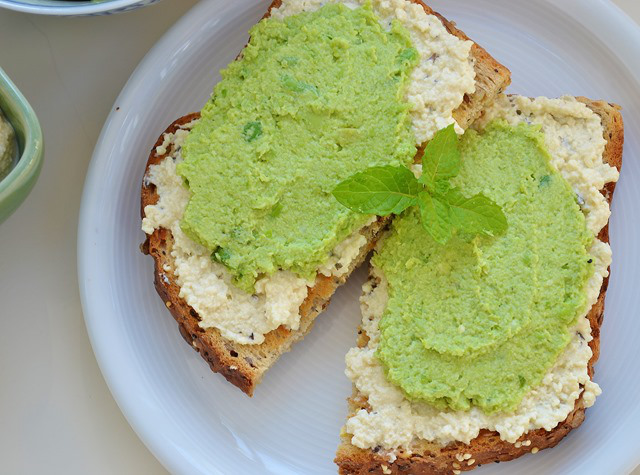
Edamame-Pea Dip + Tofu Ricotta Toasts

I opted to fancy up this lunch staple a little with the addition of a second spread for my toasts- tofu ricotta. The slightly salty, tangy ricotta is a lovely contrast to the sweet edamame-pea dip, but if you’re pushed for time then the latter is still very yummy on its own.

Edamame-Pea Dip + Tofu Ricotta Toasts

Edamame-Pea Dip + Tofu Ricotta Toasts:

1C Frozen edamame
1C Frozen peas
1Clove of garlic, minced
1T + 1t Olive oil
1/2T Tahini
1T Lemon juice
1/8t Salt
1 1/2T Fresh mint leaves

Steam the peas and edamame for approx 3 minutes then plunge into cold water to stop cooking and retain bright green colour. Set aside in a bowl.

Heat the teaspoon of olive oil in a small pan over medium and when hot add minced garlic. Cook, stirring for a minute just to take the raw garlic edge off. Add garlic to edamame and peas and add remaining olive oil, tahini, lemon juice and salt. Using an immersion blender blitz the mixture until you have a fairly smooth purée. You can also use a food processor for this. Finally add the chopped mint and pulse through.

Tofu Ricotta (For Soy-free use Cashew ricotta)

(Adapted from Veganomicon)

1/2 400g/14oz pkg Firm tofu
1 1/2T Lemon juice
2T Nutritional yeast
1/4t Salt
1t Olive Oil
1 Clove of garlic, minced
1/4t Dried basil (optional)

Using your hands crumble up tofu and squish between your fingers until you have a ricotta-like texture. Stir through remaining ingredients and taste for salt.

Spread toast with a generous layer of the tofu ricotta, followed by a good dollop of the edamame-pea dip. Serve alongside a big salad for lunch or make crostini with the spreads and serve as appetizers.

Edamame-Pea Dip + Tofu Ricotta Toasts

A few more edamame recipes to try:

If you’ve still got peaches where you are try these Portland Porch Lettuce Wraps which use edamame pesto, from Isa at the PPK.

These Vegan Sushi Rolls with Sticky Walnuts and Edamame also look fantastic.

You could thrown them in a veg-loaded hummus wrap.

Or, if you’re in the mood for something a little more wacky…how about these Teriyaki glazed Brown Rice and Edamame Burgers?

Vegan MoFo Banner

A is for…

Amazake!

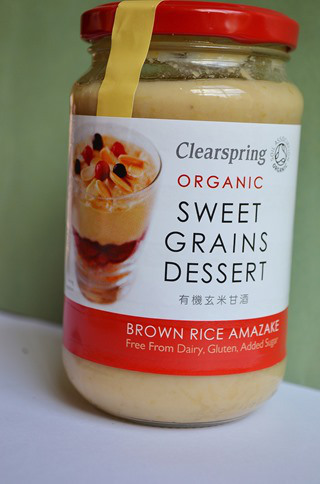
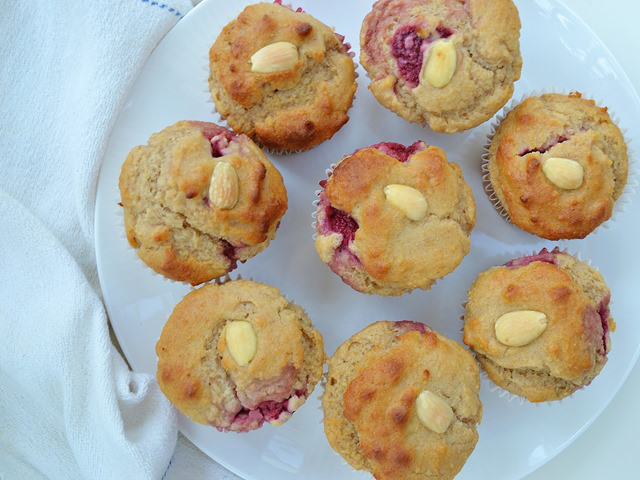
This was a product I’d never heard of before but it’s been a great discovery. I introduced it in my review of Clearspring products but if you missed that post or are new to the blog here’s a little intro, in case you’re unfamiliar with it. Strawberry-Almond Amazake Muffins

Amazake is a  Japanese ingredient made from just 3 ingredients- whole grains, water and salt. The traditional Japanese process uses a koji culture to convert the carbohydrates in the grains into simple sugars and magically transform them into these wonderfully thick and creamy dessert.

Traditionally it’s turned into a hot drink combining approx 1/4C with 3/4C hot water. I prefer to make a more creamy, comforting drink simply adding a spoonful into a mug of warm almond milk. I happen to love it straight out of the jar too. You can also blend in fruits, cocoa, extracts and make puddings or smoothies in all kinds of flavours and Clearpring have a whole host of other recipes using amazake on their site.  I decided it would be great to use as a sweetener in baked goods and love slightly sweet muffins for breakfast so the decision was made!

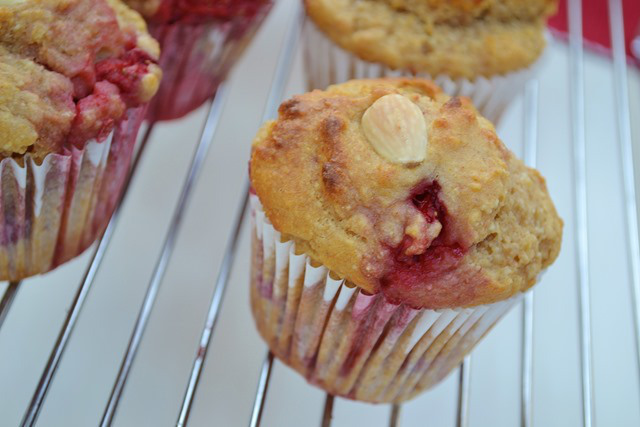
Strawberry-Almond Amazake Muffins

I had picked up even more strawberries than I could eat fresh a few weeks ago and frozen them, a very good decision it turned out as strawberry season’s over here now but I’ve already been missing them. I love the flavour of almonds with fruit so added ground almonds to the mix for flavour and moisture, and a little almond extract to amp up the taste.

Strawberry-Almond Amazake Muffins

Aren’t they pretty?! A wonderfully soft, tender crumb, a puffy top and little jammy bites of sweetness. Just how I like them.

Strawberry-Almond Amazake Muffins

Strawberry-Almond Amazake Muffins:

These are only mildly sweet so perfect for breakfast in my eyes. If you do like your muffins sweet then replace 2-3T of the almond milk with liquid sweetener i.e. agave nectar, brown rice or maple syrup. You can also just serve drizzled with a little agave instead.

1C Light spelt flour
1/2C Ground almonds (These might have a different name outside the UK but here are blanched, finely ground almonds)
2t Baking powder
1/8t Salt
3 1/2T Oil
I  380g/13.5oz Jar Amazake
1/4C Almond milk
1/2t Almond extract
1/2t Vanilla extract
1C Chopped strawberries + 1T Flour
8 Blanched almonds (optional)

Preheat oven to 180C/350F. Line a muffin tray with 8 paper cases.

Combine dry ingredients in a large bowl. In a smaller bowl whisk together amazake, oil, almond milk and extracts. Add wet to dry and stir to combine. Don’t over-mix or you’ll end up with tough muffins. Toss strawberries with 1T flour to prevent them from sinking to the bottom of the muffins and gently fold them into the mixture.

Divide mixture evenly between the paper cases and top with an almond if you like.

Bake for 30-35 minutes, until lightly brown and a toothpick inserted into a muffin comes out clean.

Makes 8

Strawberry-Almond Amazake Muffins

Hannah of Bittersweet even made her own amazake! If you can’t find amazake in grocery stores near you or are just feeling ambitious in the kitchen, why not give it a go?

Strawberry-Almond Amazake Muffins

Is amazake new to you? If not tell me how you like to use it!

Hope everyone’s enjoying the start of MoFo! So happy to be participating this year. I’ll be back with the letter B tomorrow!

Vegan MoFo Banner


Vegan Month of Food 2013

You may have noticed the little icon which has appeared on my right sidebar? Vegan Mofo 2013!

Yup. I’ve signed up! After much deliberation and some encouragement from others I figured I could do it. If you’re new to Vegan MoFo and Coconut and Berries and missed my earlier explanation, the idea of Vegan MoFo (Month of Food) is for bloggers to write as much as they can about vegan food over the designated month, this year it’s September,  and show the world that vegan food is the way to go!

Bloggers usually take on a theme for the period and write posts accordingly. There aren’t strict guidelines for how often to write, but the idea is to shoot for every weekday, or about 20 times in the month.

This is my first year participating and I’ve got a busy month ahead of me so I’m keeping fairly simple and doing an A to Z theme.A to Z

I’ll be working through my pantry from A to Z, unearthing ingredients I’ve never or hardly used, or using more familiar ingredients in new ways. I’m planning on sharing a mix of my own recipes, other bloggers’ recipes and recipes from my cookbooks. I’m aiming to write every weekday, but you never know, I might throw in a few extra posts here and there if I have any more ideas (and can find time). There are some great MoFo ideas on this post some of which I’d like to do too! Too much to share, too little time!

I hope, whether you’re participating or reading, that you’re getting excited for kick-off!

See you back here for the letter A !!!